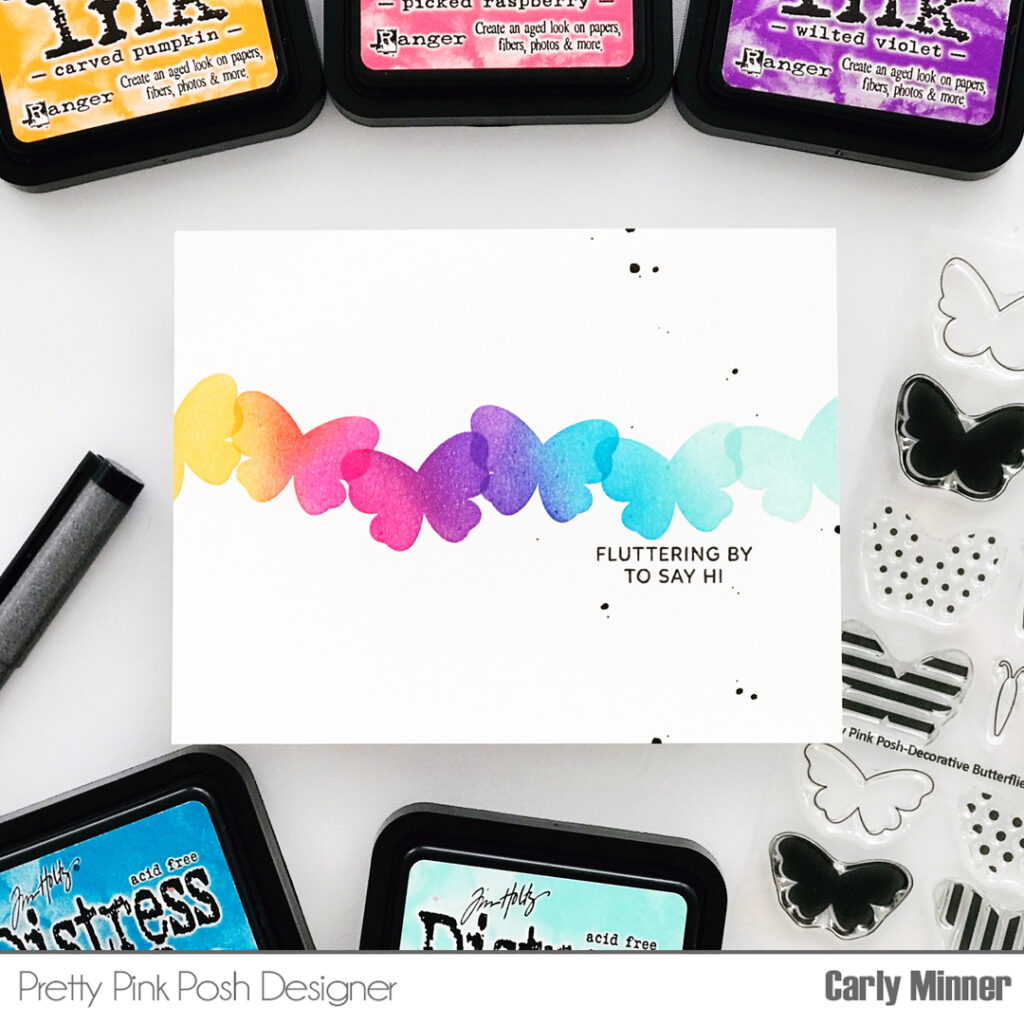
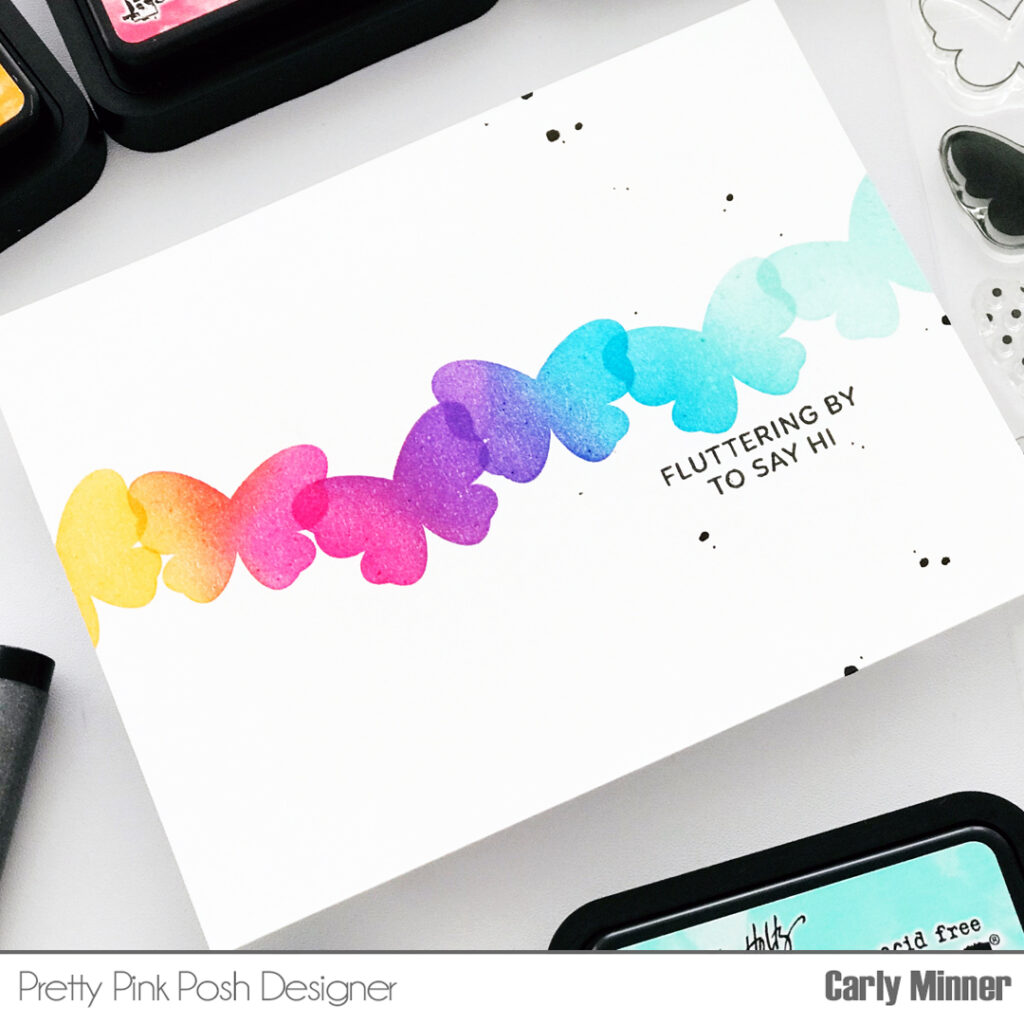
I cannot get enough butterflies this spring and I’m so smitten with the versatility of this stamp set! There are so many possibilities with the shapes and patterns but the solid butterflies also offer a chance to play with fun inking techniques like this one!
Here are the Distress ink colors I used:
Carved Pumpkin
Picked Raspberry
Wilted Violet
Mermaid Lagoon
Salvaged Patina
Thanks so much for stopping by! I hope you were inspired by this technique and card.
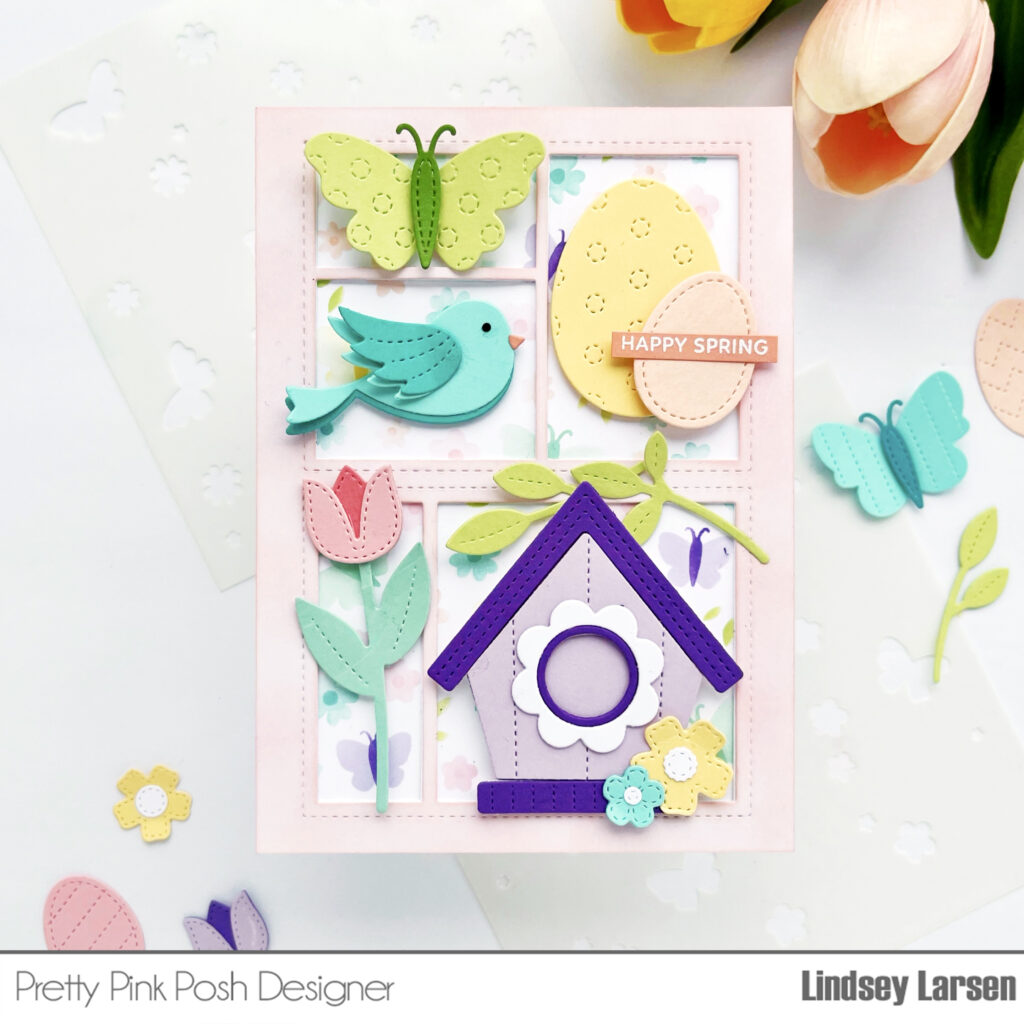
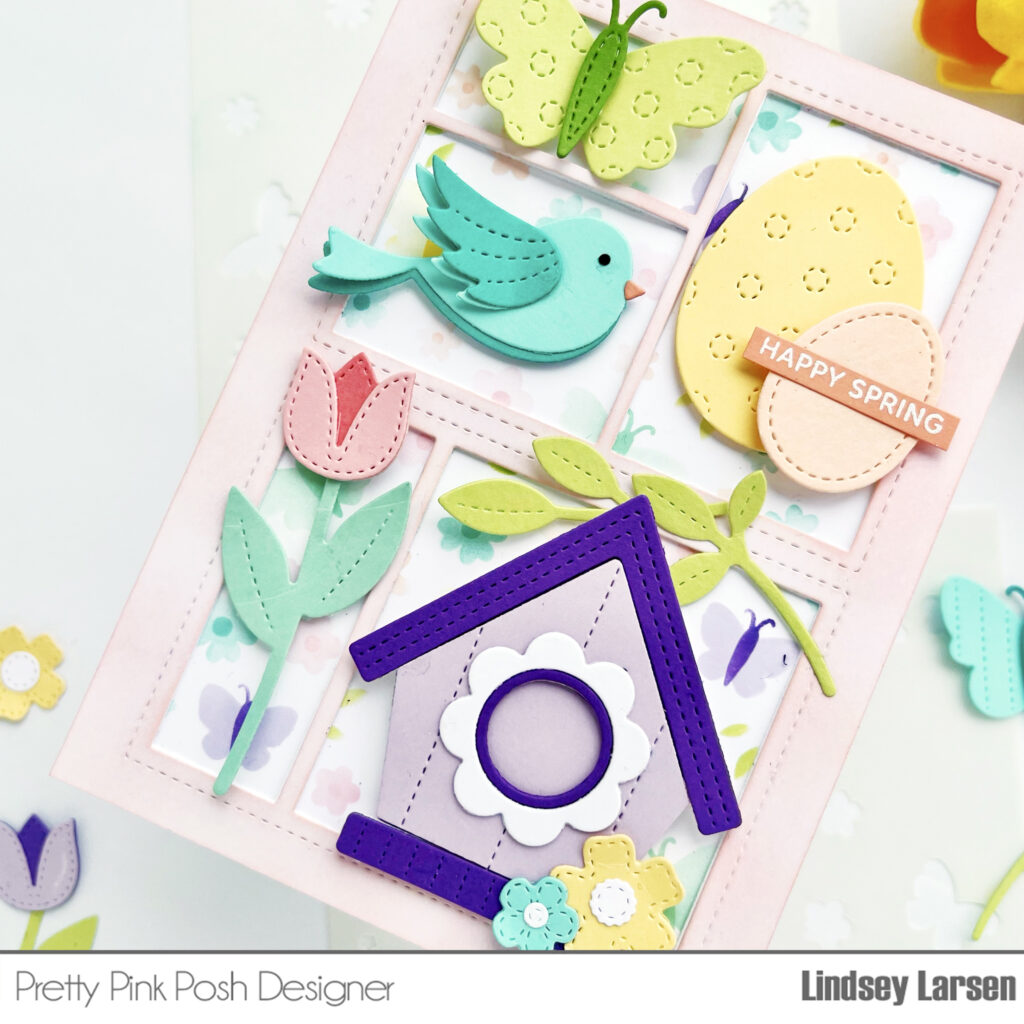
Good morning! Welcome to Day 3 of Spring Theme Week! Aren’t you loving all the happy, colors and images of spring? It’s Lindsey here today. Last fall I stacked two of the storybook dies to create little cubbies on a slightly larger A6 size card. I decided to recreate the collage look on today’s card giving it a spring refresh.
I started by adding some color to my card base with the Layered Butterfly Floral Stencils. They are full of darling images! Then I built my little cubbies by stacking theStorybook 1 and Storybook 5 dies and layered them a few times for depth.
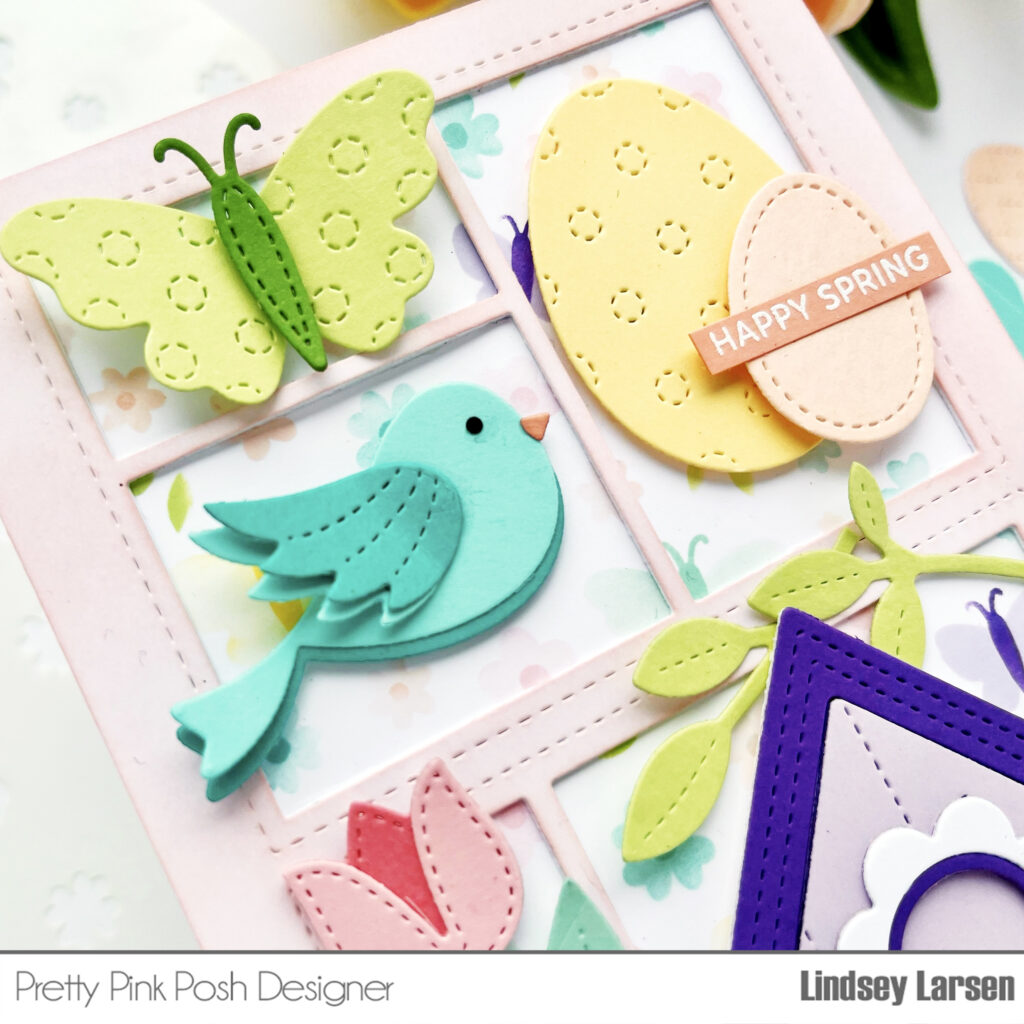
Now comes the fun part: filling each one up! Pretty Pink Posh has so many cute stitched dies, and I’ve use some of my favorites today. I started with the Stitched Butterflies and Stitched Birds.
I ran out of cubbies before I ran out of darling dies to use, so you have lots more options at your disposal. Make sure you come back tomorrow for even more spring cuteness, and don’t forget that this week all items in the Spring Section are 15% off, so you can pick up all of your favorites!
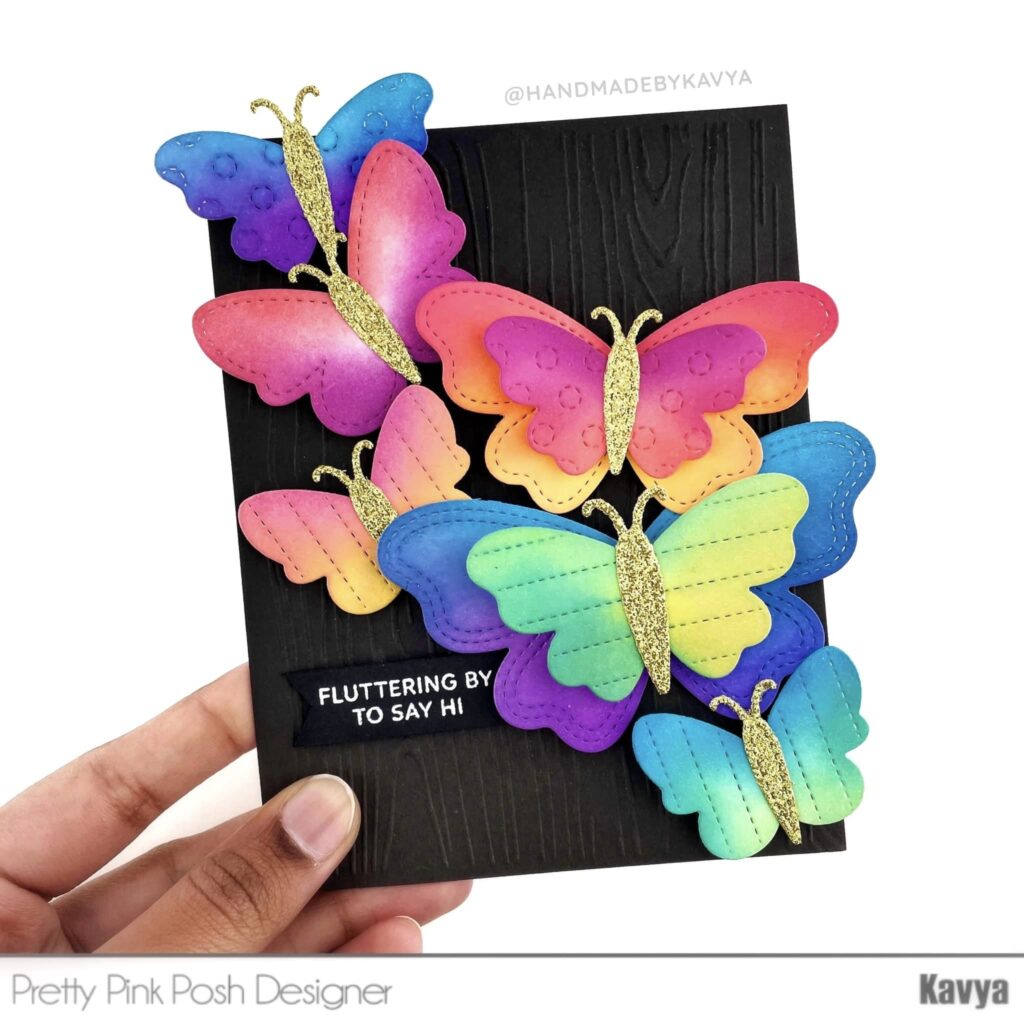
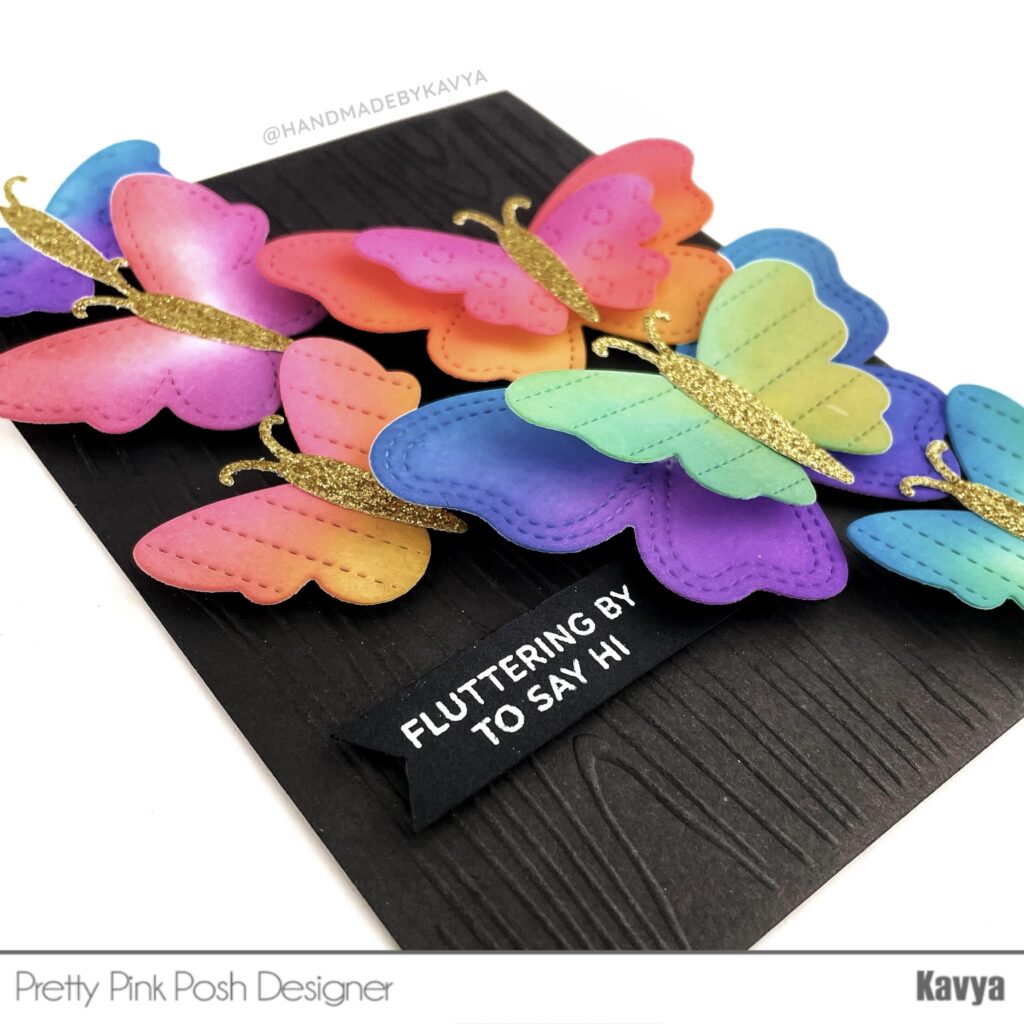
Hi folks! Kavya here with a fun spring project! Can you believe that the card I am about to show you only uses one die set? Anyone who knows me would know that I love to use multiple sets at a time. But these awesome Stitched Butterflies dies are perfect on their own!
I started off by die cutting a bunch of butterflies using the die set out of white cardstock. I ink blended all the butterflies using dye inks in the shades of pink, red, orange, blue, purple, green and yellow. I die cut the butterfly bodies using gold glitter cardstock. Use LOTS of foam to layer the butterflies on black card base. Add a sentiment from the Decorative Butterflies stamp set and you are done!!
Wasn’t that simple? Absolutely love how this one turned out!
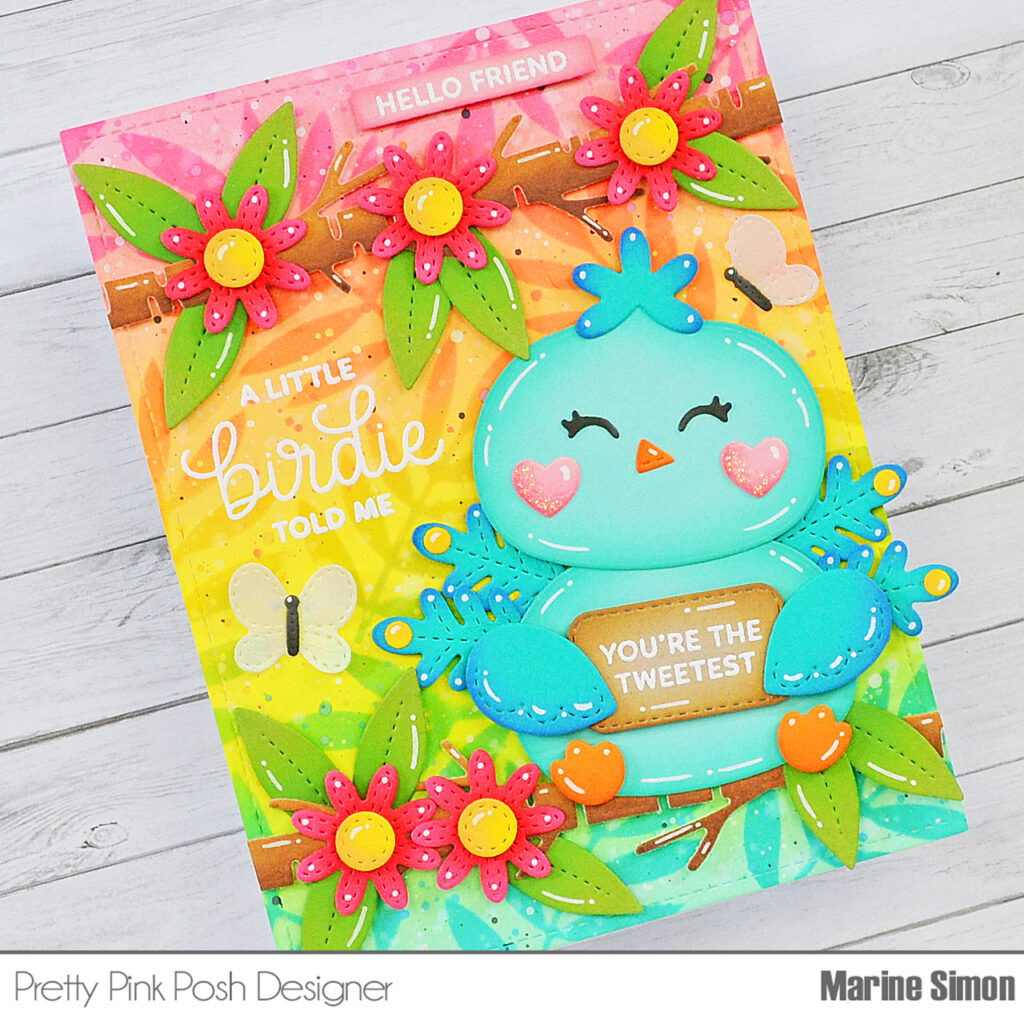
Hello crafty friends, Marine here with you today, thanks so much for stopping by! I’m thrilled to be back with this super bright and fun only die-cut card featuring a lovely peacock perched on a branch. As a huge fan of mixing and matching items from my stash, this is what I did on this card, and you will find a detailed list of the supplies I used down below.
I started off by creating a bright rainbow leafy background to set my tropical scene on a 5,5 x 4,25 inches Strathmore bristol smooth panel using distress oxide inks. From top to bottom, I applied kitsch flamingo, dried marigold, squeezed lemonade, twisted citron and salvaged patina. This gave me a nice pastel rainbow base, and then I added leaves using one of the Layered Leaves & Flowers stencils along with darker oxide inks. From top to bottom, I applied picked raspberry, carved pumpkin, mustard seed, mowed lawn and peacock feathers. I mixed each of these darker inks with water to make splatters on the background using a small brush, and then did the same with black soot oxide ink and copic opaque white ink to bring more contrast and interest to my panel.
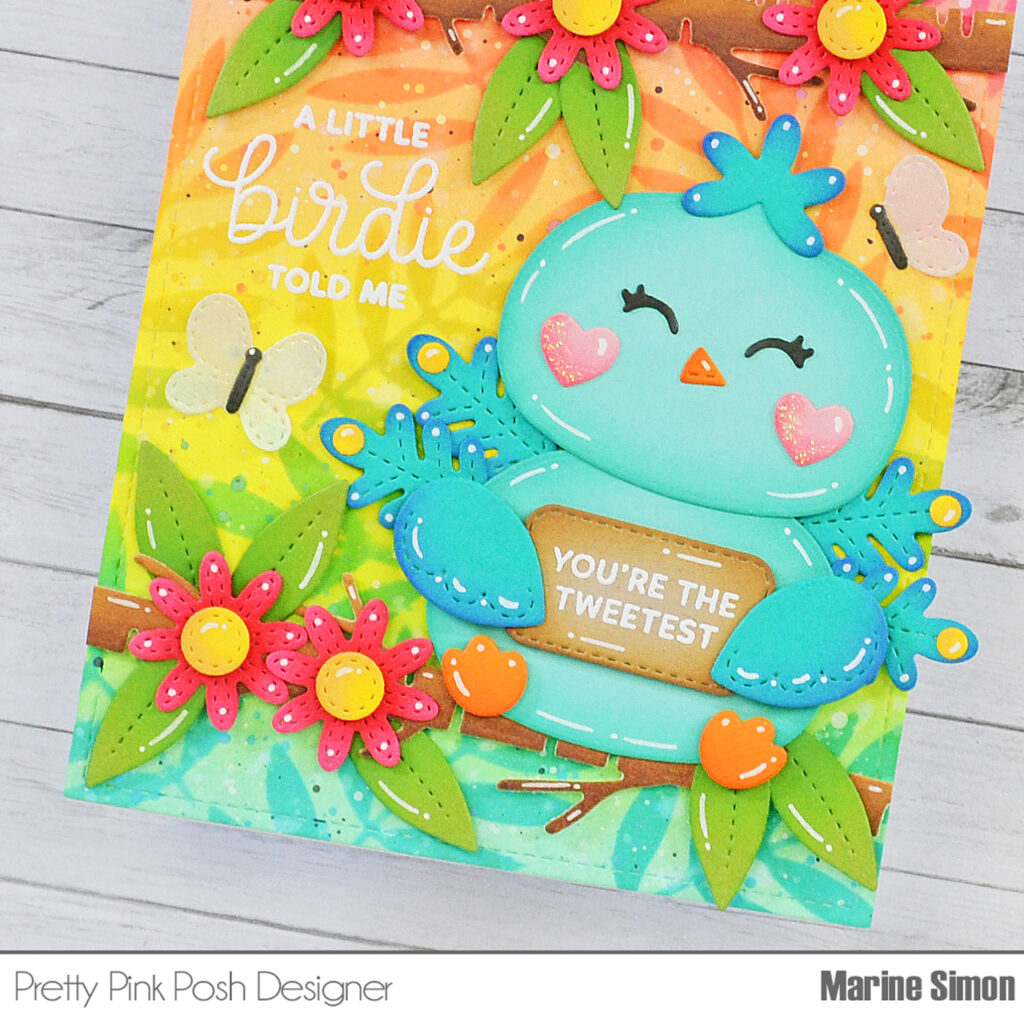
Next I die cut all the bits and pieces from colored cardstock using multiple dies from different sets: • Big Easter Cupcake for the peacock’s body, wings, cheeks, sign • Easter Mug Additions for the feathers, eyes, feet, beak • Party Hats for the peacock’s comb • Spring Mug Additions for the butterflies, leaves, flowers • Nature Essentials for the branches
I added more depth to each die-cut piece using matching oxide inks, and attached everything on my panel using 1mm and 2mm foam squares, as well as liquid glue, leaving enough space on the left and at the top for two of my greetings.
Speaking of which, next I worked on my three white heat embossed greetings. I embossed “Hello friend” from Mouse Friends on light pink cardstock, trimmed it into a slim banner using a Sentiment Stripsdie, and attached it at the top of my panel using 1mm foam squares. Next I embossed “A little birdie told me” from A Little Birdie on the left hand side of my panel, and finally embossed “You’re the tweetest” from the same set on the sign that I attached between the peacock’s wings using 1mm foam squares again.
As always I finished my card by adding highlights and details to my card using a white gel pen, and that’s it! I hope that my card has inspired you to look at your supplies differently, and to think outside the box. This peacock could definitely turn into a chubby seagull at summertime, or even a crow during the fall season. So many possibilities here, it just depends on the colors you use.
Thanks again for stopping by, and see you next time.
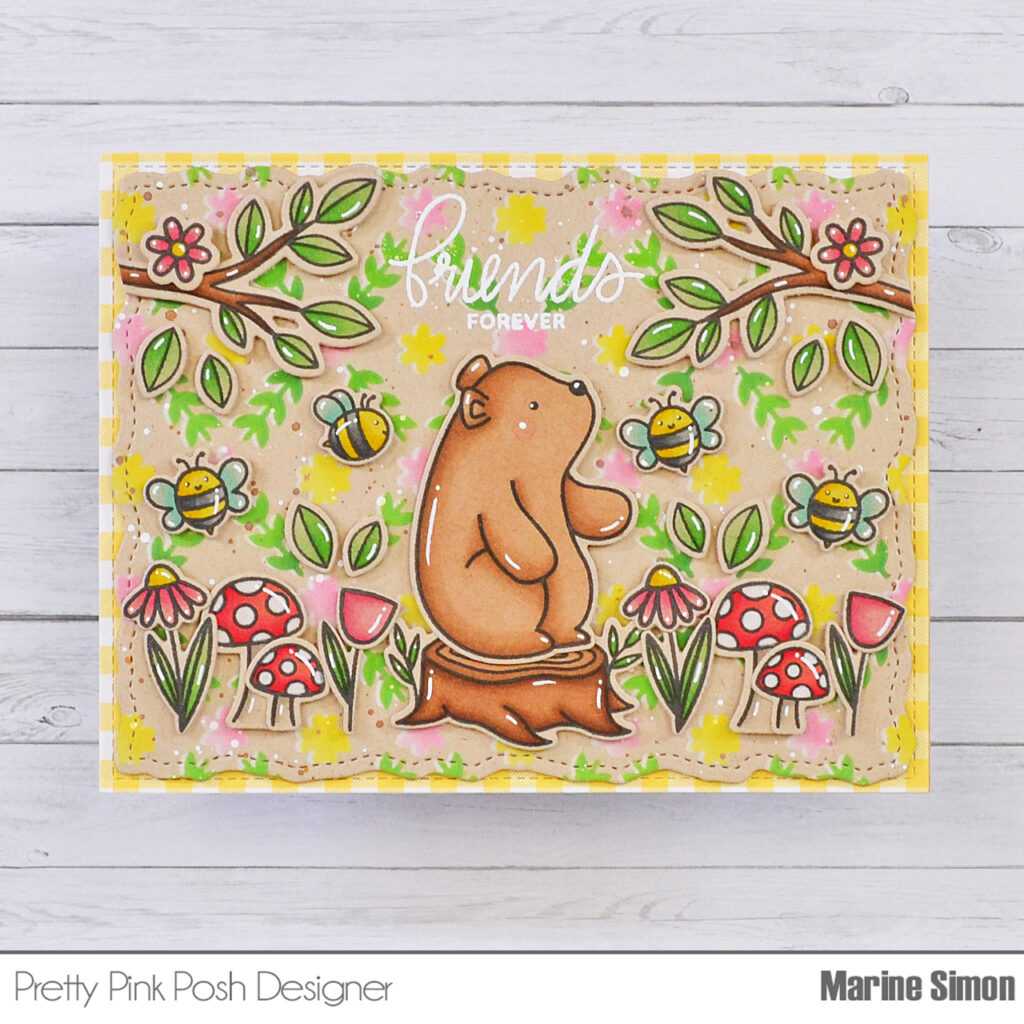
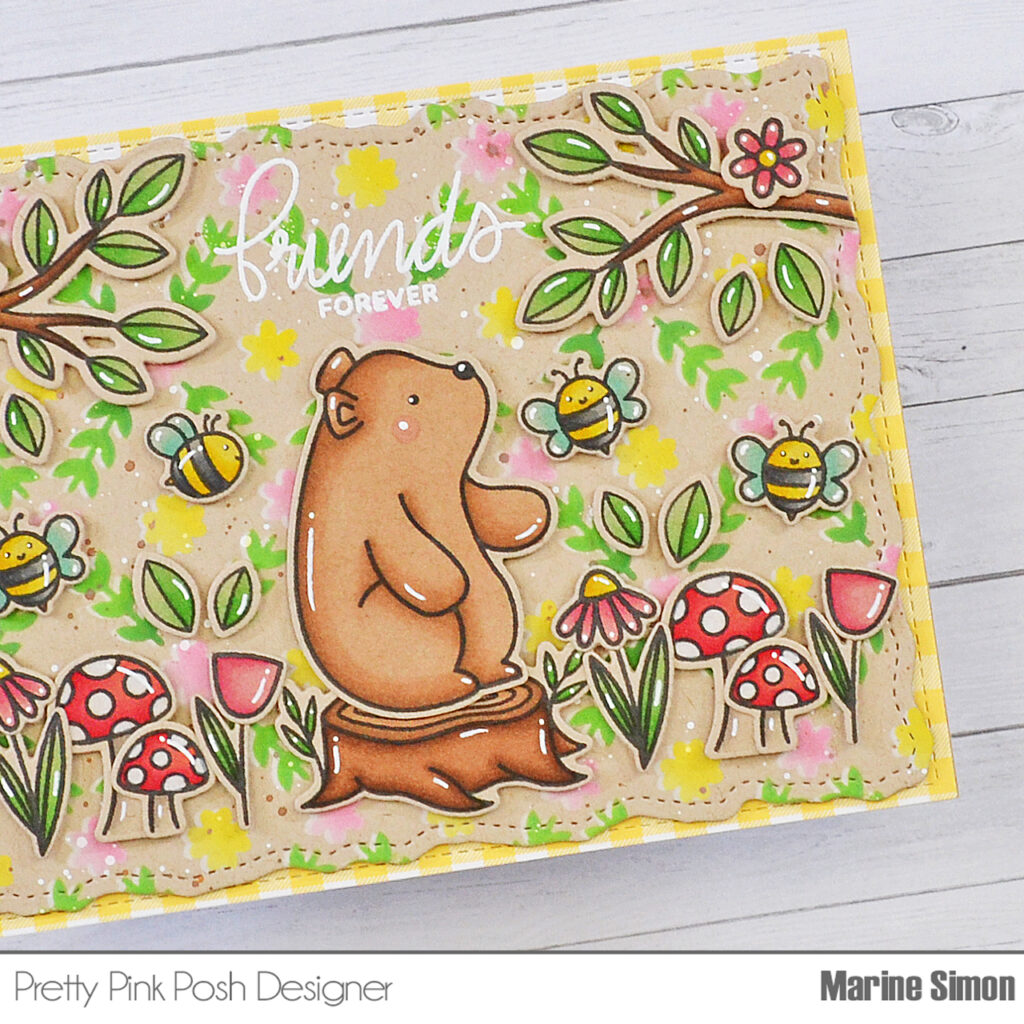
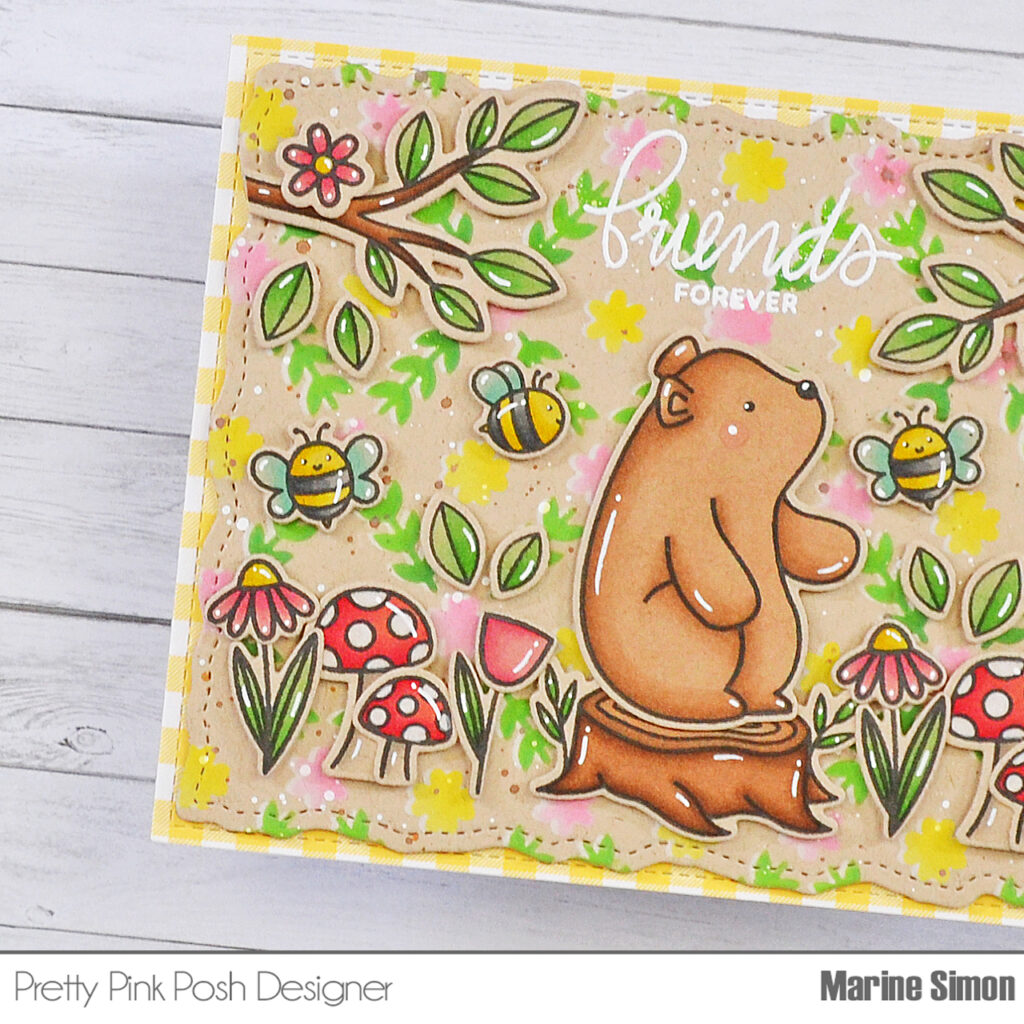
Hello crafty friends, Marine here, I’m so happy to be back on the blog with this lovely spring card showcasing multiple items from my Pretty Pink Posh stash. Mixing and matching stamps is one of my absolute favorite things to do, as well as coloring on kraft cardstock, so I combined both of these on today’s card.
I started off by stamping my images on kraft cardstock from Lawn Fawn using an alcohol marker friendly black ink, I used the matching dies to cut them all, and colored everything using my Spectrum Noir Illustrator markers and Graph’it brush markers. And I used a white pencil for the spots on the mushrooms.Here is a detailed list of the stamp sets I used: • Woodland Critters for the bear and mushrooms • Bee Friends for the bees, tulips and daisies • Spring Robins for the branches • Jungle Friends for the leaves • Easter Wreath for the flowers on the branches.
Next I cut a Stitched Torn Rectangle panel out of the same kraft cardstock as the images, and created a beautiful background using the Layered Floral Vines stencils. I first did a white base using white pigment ink, and then used the stencils again along with distress oxide inks: for the greenery I applied mowed lawn and rustic wilderness, for the pink flowers I applied spun sugar and worn lipstick, and for the yellow flowers I applied squeezed lemonade and mustard seed. I mixed some vintage photo oxide ink with water and used a small brush to make splatters on the panel, and did the same with copic opaque white ink.
Once my panel was dry, I white heat embossed my “Friends Forever” greeting from Woodland Critters in the top middle part of the panel, attached all my images using 1mm and 2mm foam squares, stuck my panel on a 5,5 x 4,25 inches yellow gingham panel using foam tape, and finished my card by adding highlights and details to the images using a white gel pen.
And that’s it. I hope my card inspired you to try to color on kraft cardstock. It’s super fun, and it gives a toned down, almost vintage, look to a card. I absolutely love that!
Thanks so much for stopping by, and see you next time!
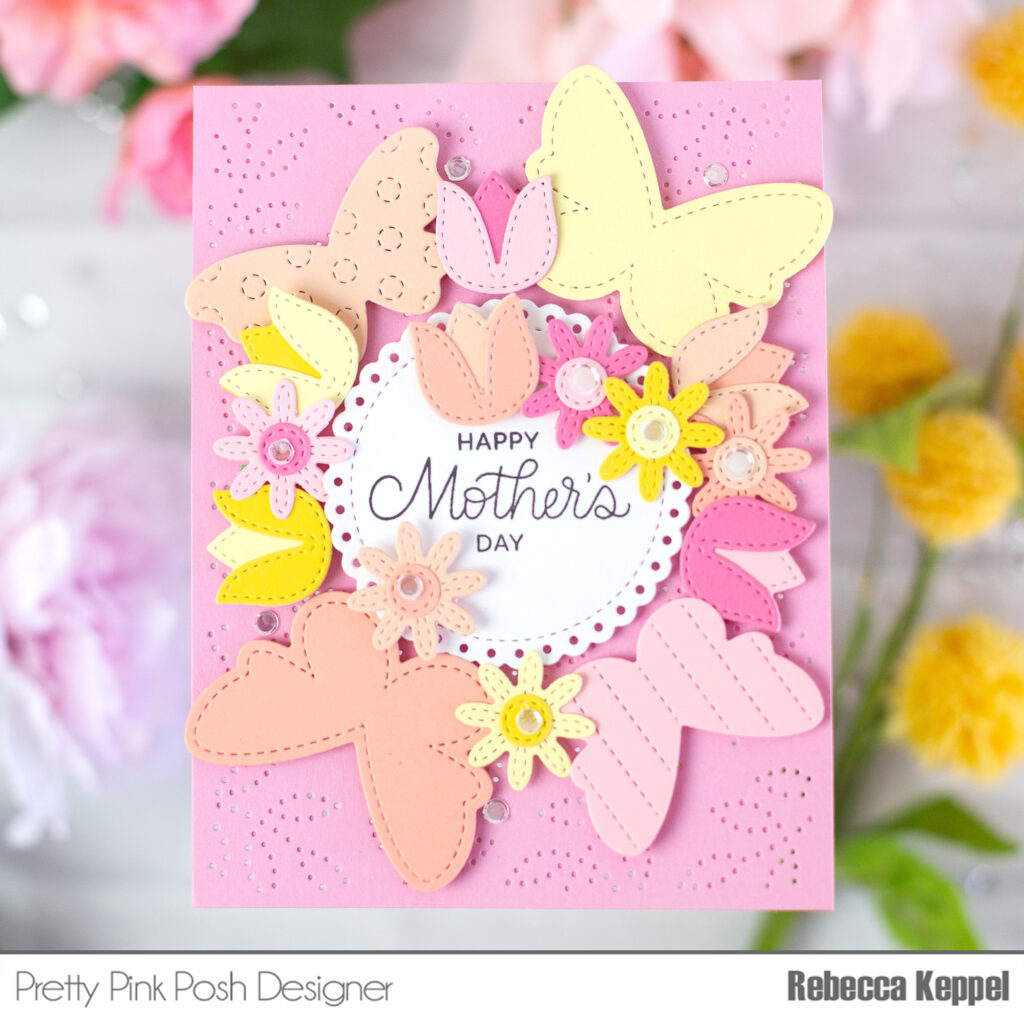
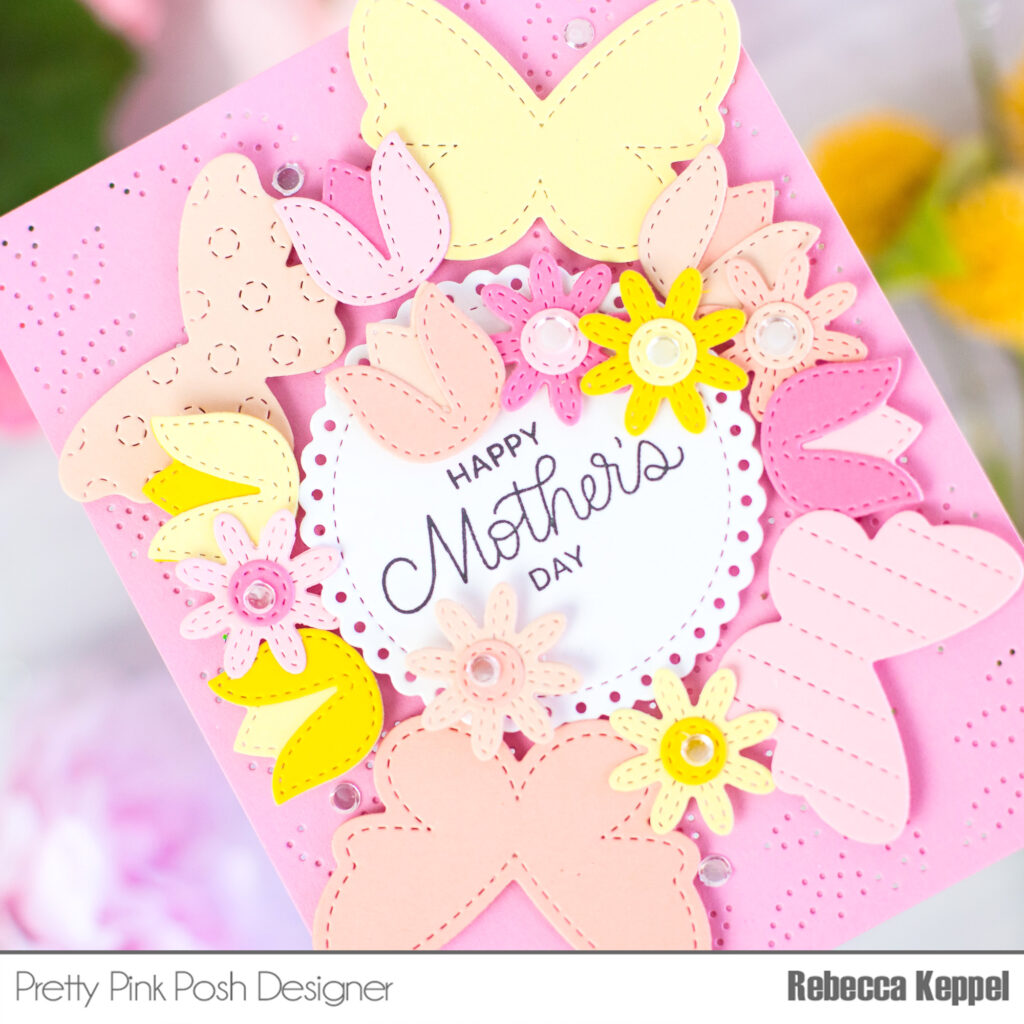
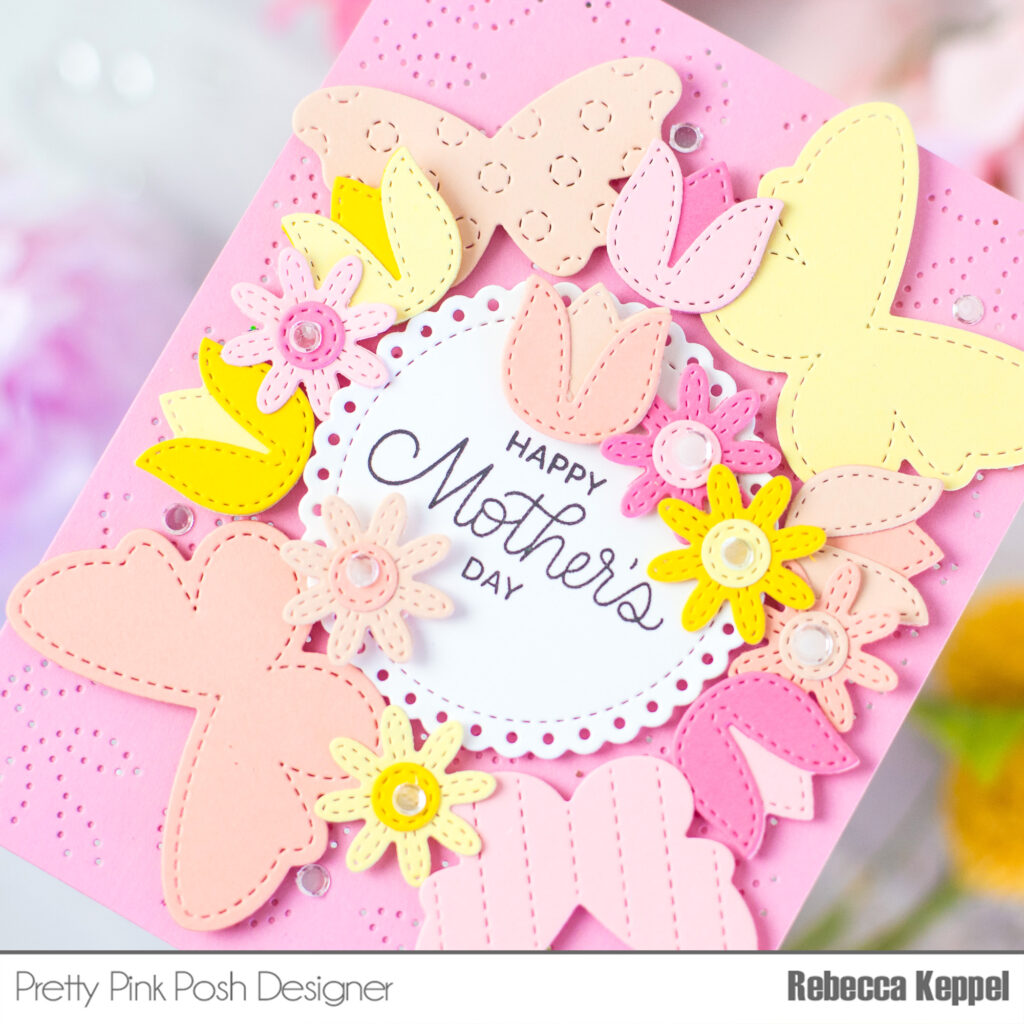
Hi everyone! Rebecca here. One of the many things I love about Pretty Pink Posh dies is that they often cut an adorable image AND faux stitched or pierced lines. Combining different Pretty Pink Posh dies with these additional elements makes creating a pretty Mother’s Day card with tons of interest so quick and easy!
Use other colors of cardstock to cut out several Stitched Butterflies Dies and flowers from the Spring Mug Additions Dies. Adhere the layers of the flowers together and then pop up the butterflies and flowers around theEyelet Circlesentiment. Adhere some of your favorite confetti mix to add some shine! And that’s it.
I think you will be amazed when you see how much interest these dies add! Thank you so much for stopping by!
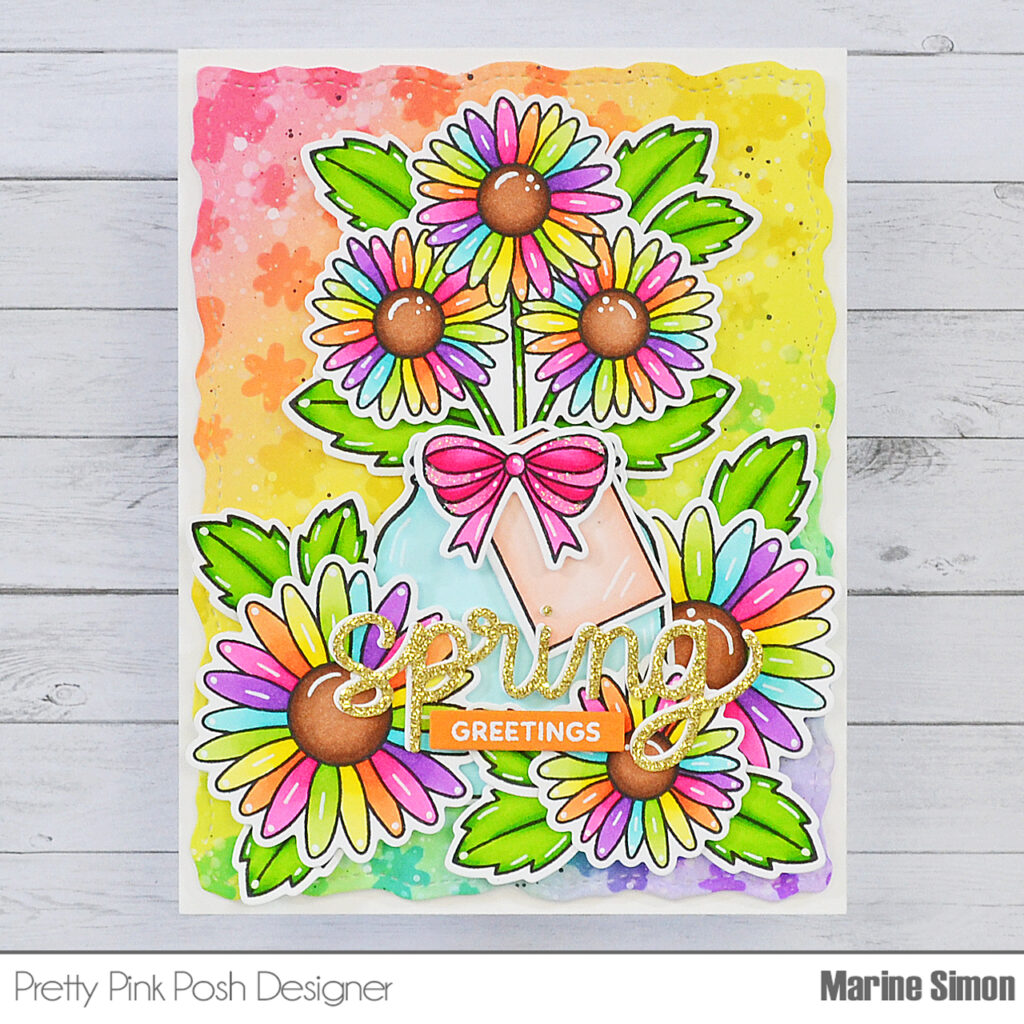
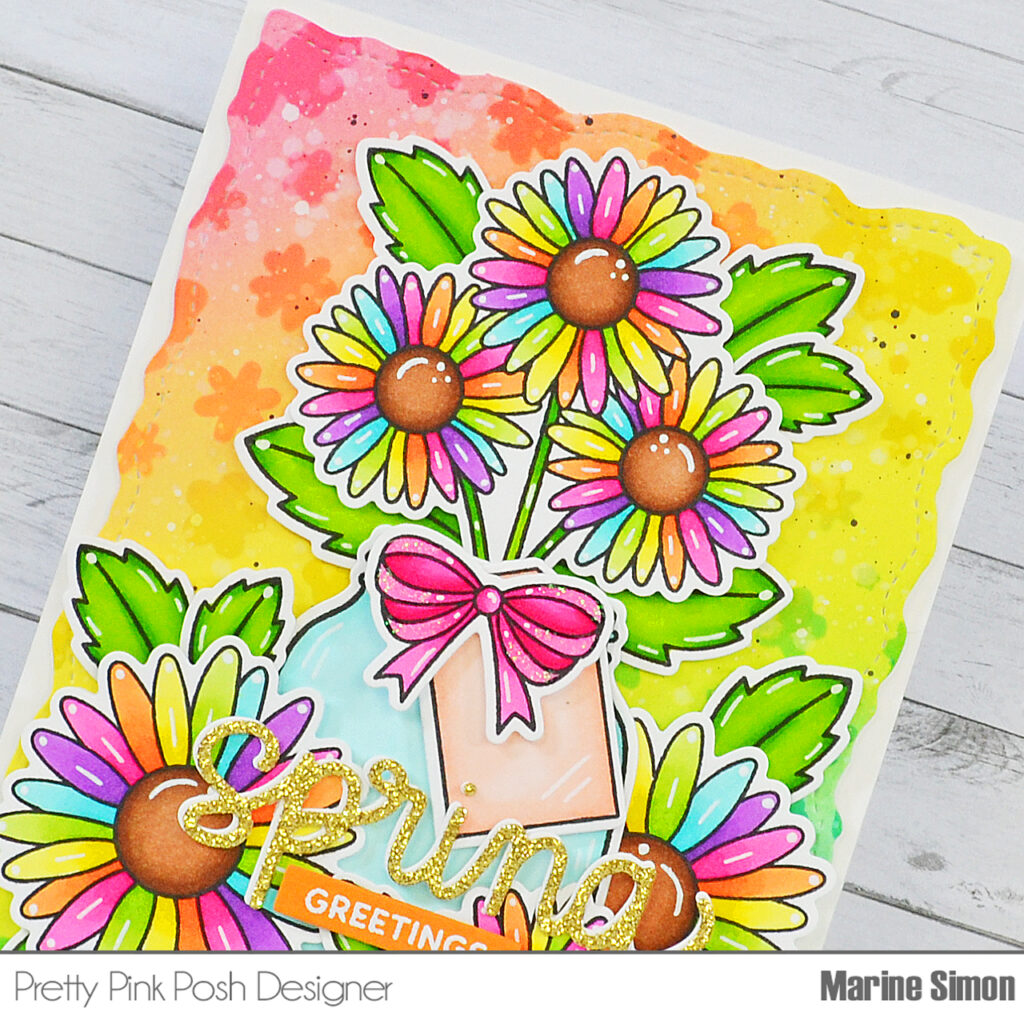
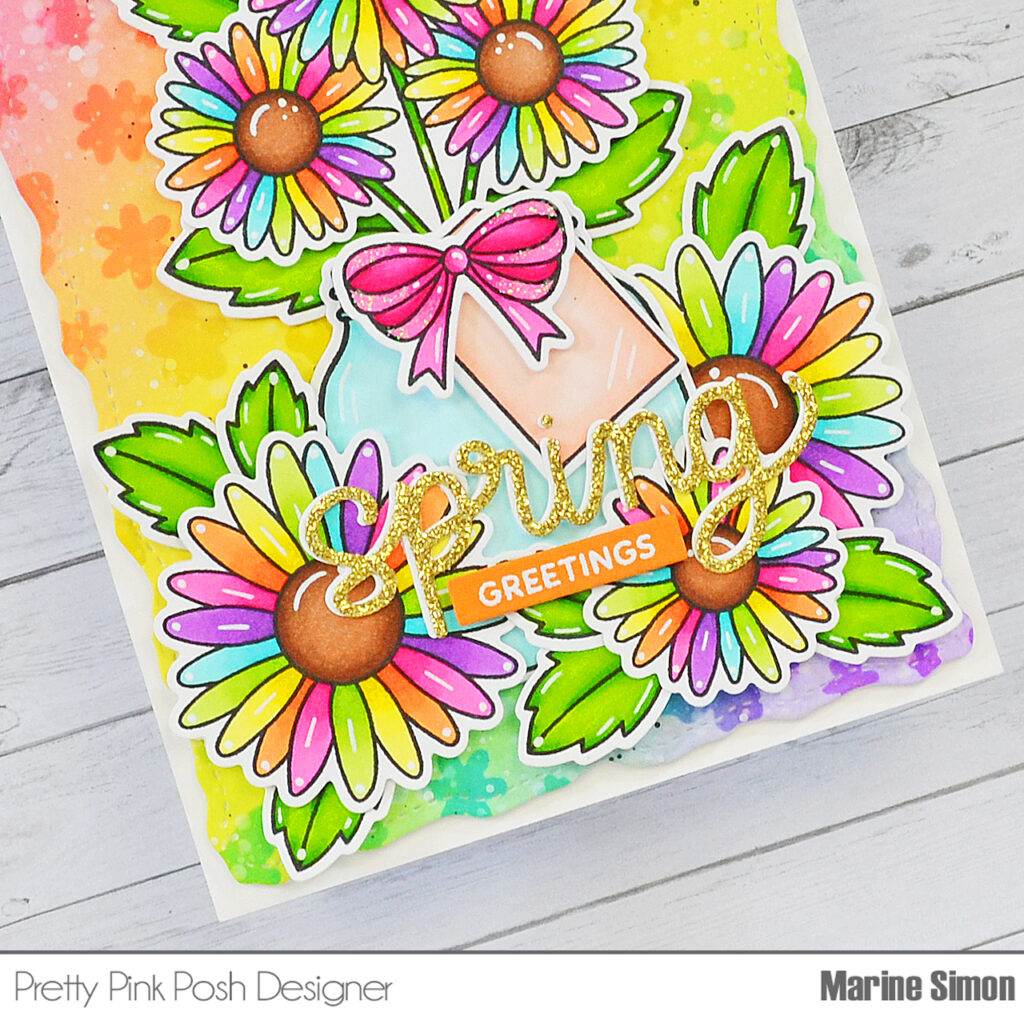
Hello crafty friends, Marine here, I’m thrilled to be back on the blog with this super duper colorful card showcasing the beautiful Daisies and the gorgeous Layered Butterfly Floral stencils. When I first saw those daisies, I immediately pictured them with rainbow petals, so I took my brightest markers and inks out to create this bright and bold card.
I started off by stamping the daisies, leaves and bow from Daisies, as well as the jar and tag from Fall Jar, on 80lb Neenah solar white cardstock using an alcohol marker friendly black ink, I cut them all using the matching dies, and then colored them using all the colors from the rainbow.
I cut a Stitched Torn Rectangle panel out of Strathmore bristol smooth cardstock, and started off by creating a simple rainbow base using, from the top left corner towards the bottom right corner: kitsch flamingo, dried marigold, squeezed lemonade, twisted citron, salvaged patina and shaded lilac oxide inks. Next I used the first three Layered Butterfly Floral stencils, and one after the other, applied darker shades of inks to create a tone on tone pattern using picked raspberry, carved pumpkin, mustard seed, mowed lawn, peacock feathers and wilted violet oxide inks.
I always like to add texture to my ink blended panels, so I first splattered water all over the panel and dried it using a paper towel. Next I mixed some black soot oxide ink with water and used a small brush to make splatters on the paper, and then did the same with white ink.
I attached my Stitched Torn Rectangle panel on a 5,5 x 4,25 inches white card base, stuck the images using 1mm and 2mm foam squares, and then created my greeting. I first cut the Spring Script out of gold glitter cardstock and out of white cardstock. I attached the gold glitter one on top of the white one, but shifted them a little bit to create a white border, and stuck the word on the card using liquid glue. And I white heat embossed “Greetings” from Easter Train on a piece of orange cardstock, trimmed it into a slim banner using a Sentiment Strips die, and finally attached it below “Spring” using 1mm foam squares.
I finished my card with highlights and details on the images using a white gel pen, and a little bit of morning dew glitter on the bow for one more sparkling touch. And that’s it! I hope this card will inspire you to go bold and off the traditional color palettes you’re expected to use. Rainbows always look great, you can’t go wrong with them!
Thanks so much for stopping by, see you next time!
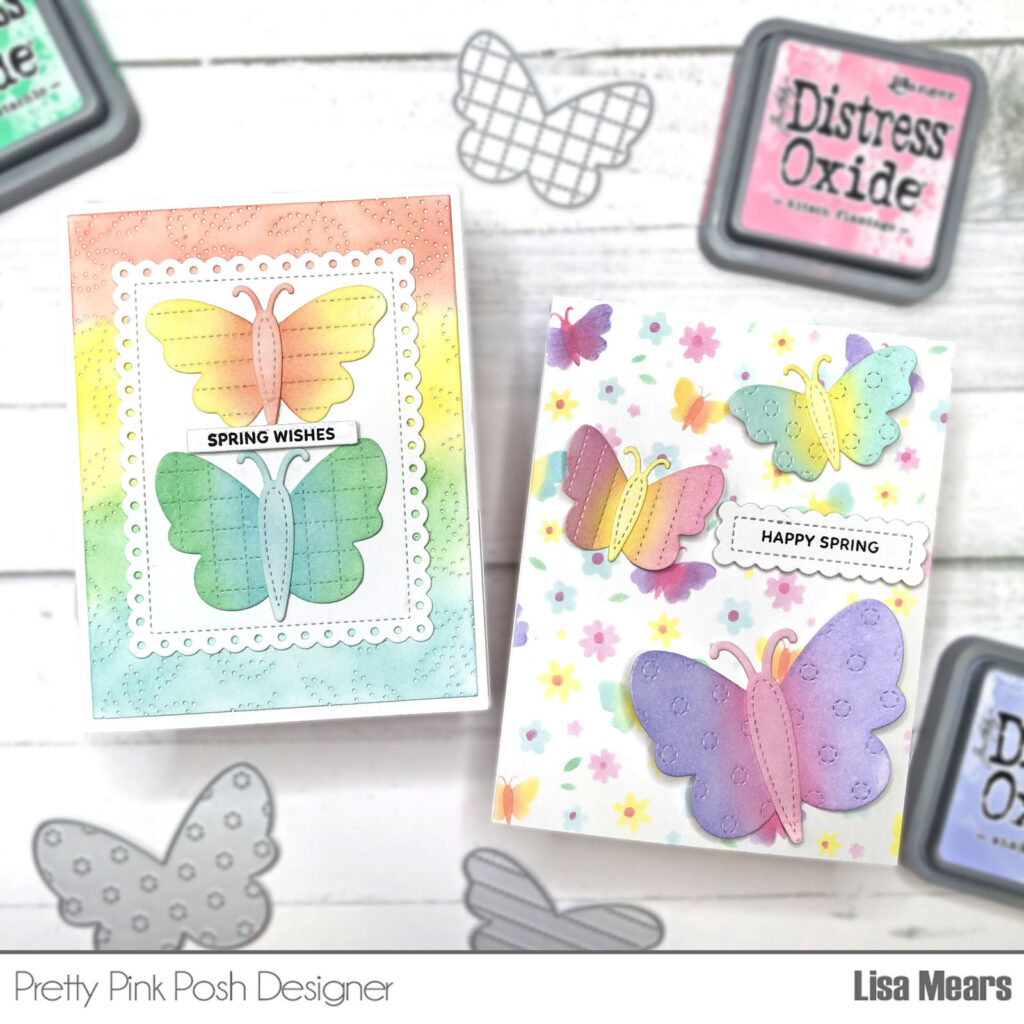
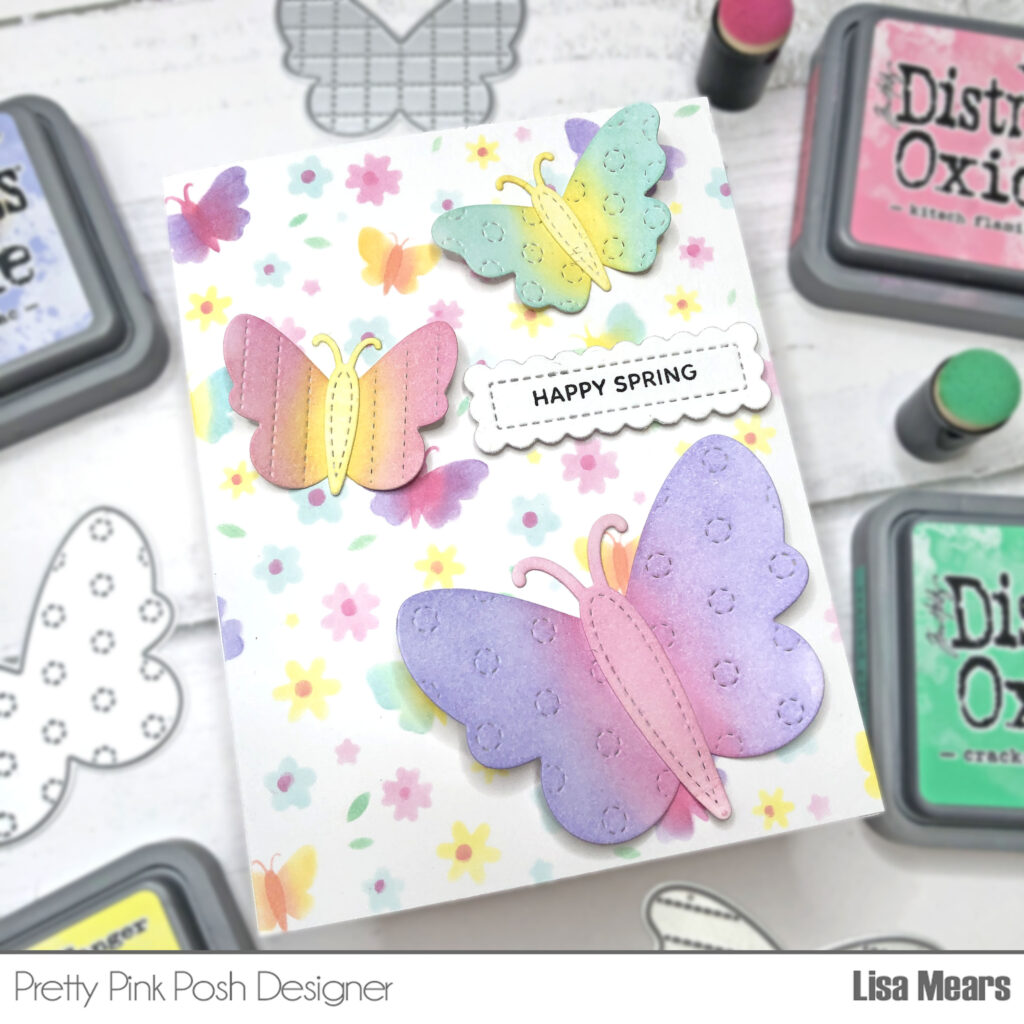
Hello crafty friends. It’s Lisa Mears on the blog today. I’m going to be using the Stitched Butterflies dies from the newest release to make two cards. I knew I wanted my butterflies to have more than one color on their wings so a great way to achieve that look is to do some ink-blending.
If you would like to see how I made my cards, watch my video below or on YouTube.
First, I die cut the Stitched Butterflies with Scrapbook.com Mixed Media White Smooth Cardstock. The smooth white cardstock, coupled with the Ranger Distress Oxide inks, made the ink-blending so effortless. The smooth and creamy texture of Distress Oxide ink allows for seamless blending, creating a beautiful gradient from one color to the next one.
The Distress Oxide inks I used for the butterflies in my first card include:
Top Butterfly: Tumbled Glass and Squeezed Lemonade Middle Butterfly: Kitsch Flamingo and Squeezed Lemonade Bottom Butterfly: Shaded Lilac and Kitsch Flamingo
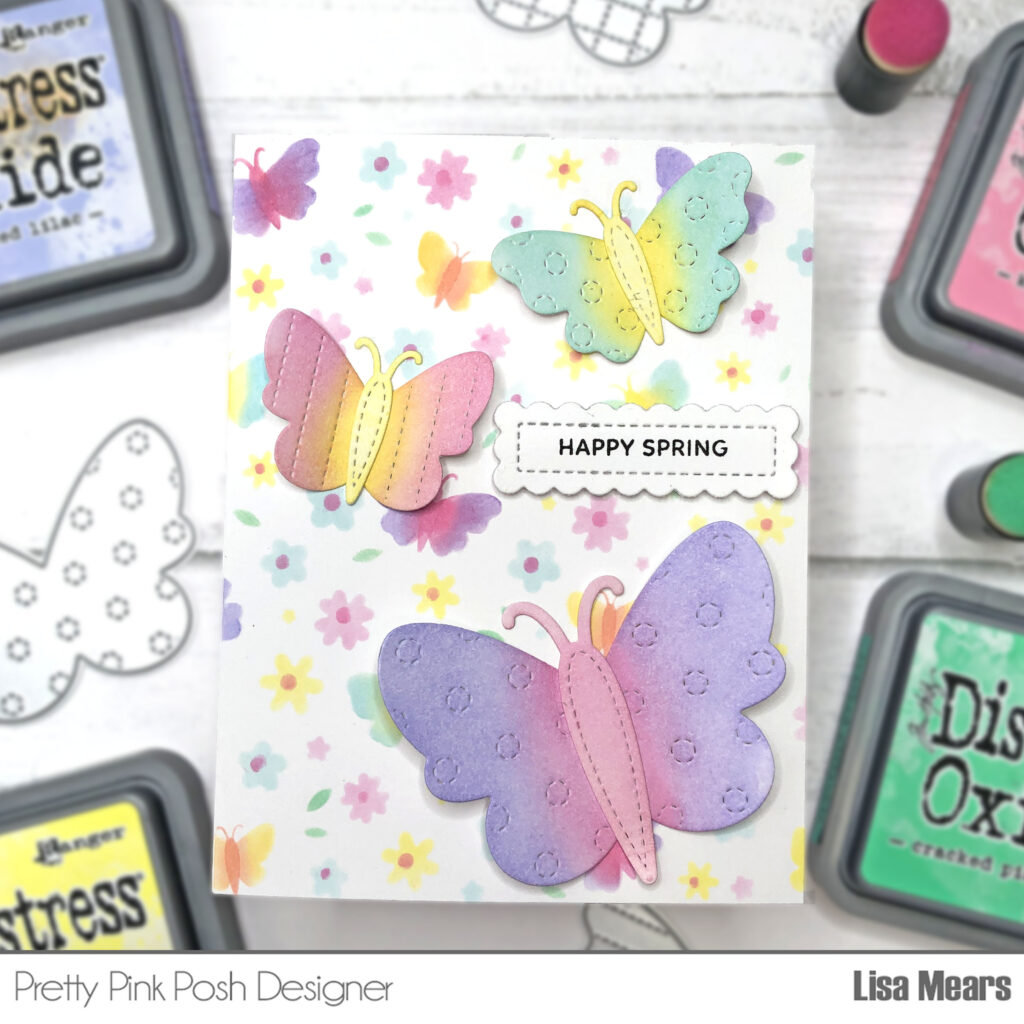
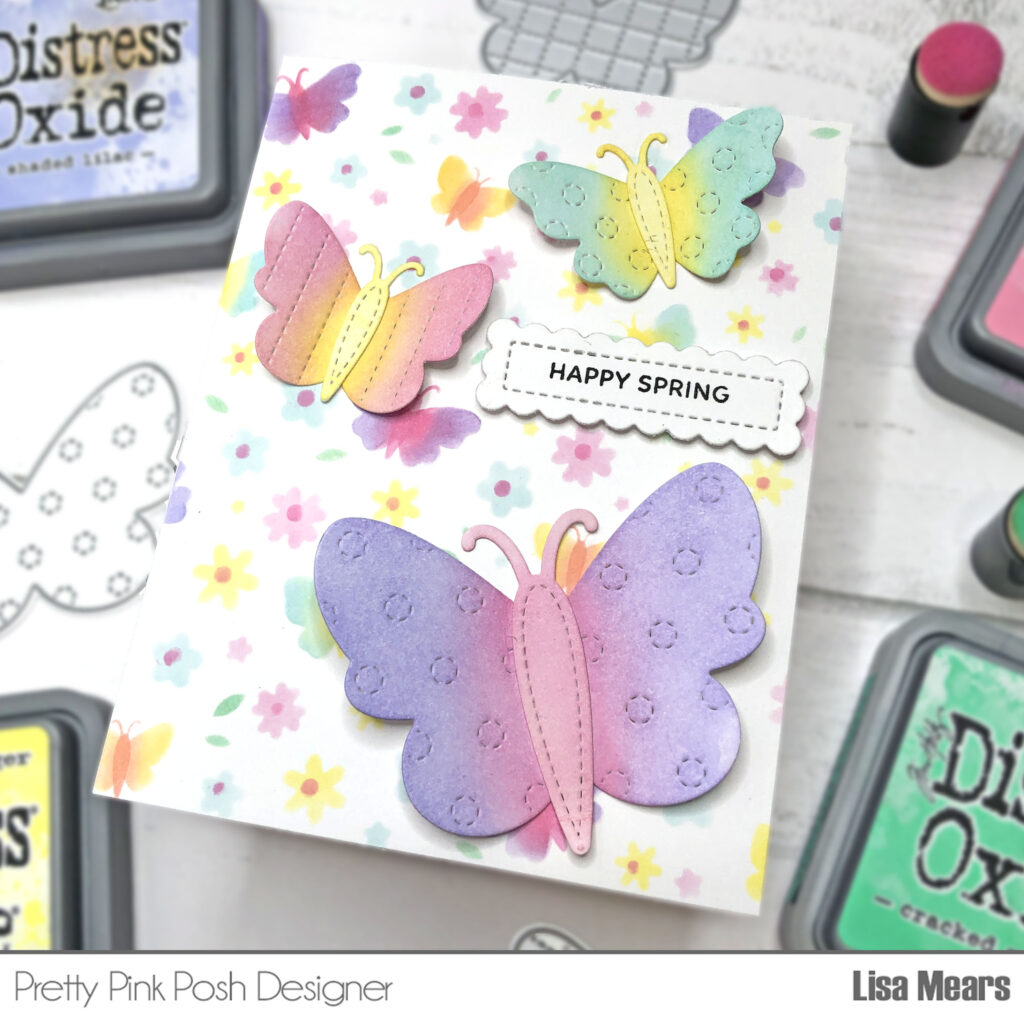
I used the Layered Butterfly Floral Stencil for the background of my card. This stencil has a mix of butterflies and flowers which I inked in several different spring color Distress Oxide inks including Shaded Lilac, Kitsch Flamingo, Squeezed Lemonade, Saltwater Taffy, Cracked Pistachio, and Tumbled Glass. I even ink-blended two colors of ink for the butterflies in the stencil using a very detailed ink blending brush to get into the small areas of the stencil.
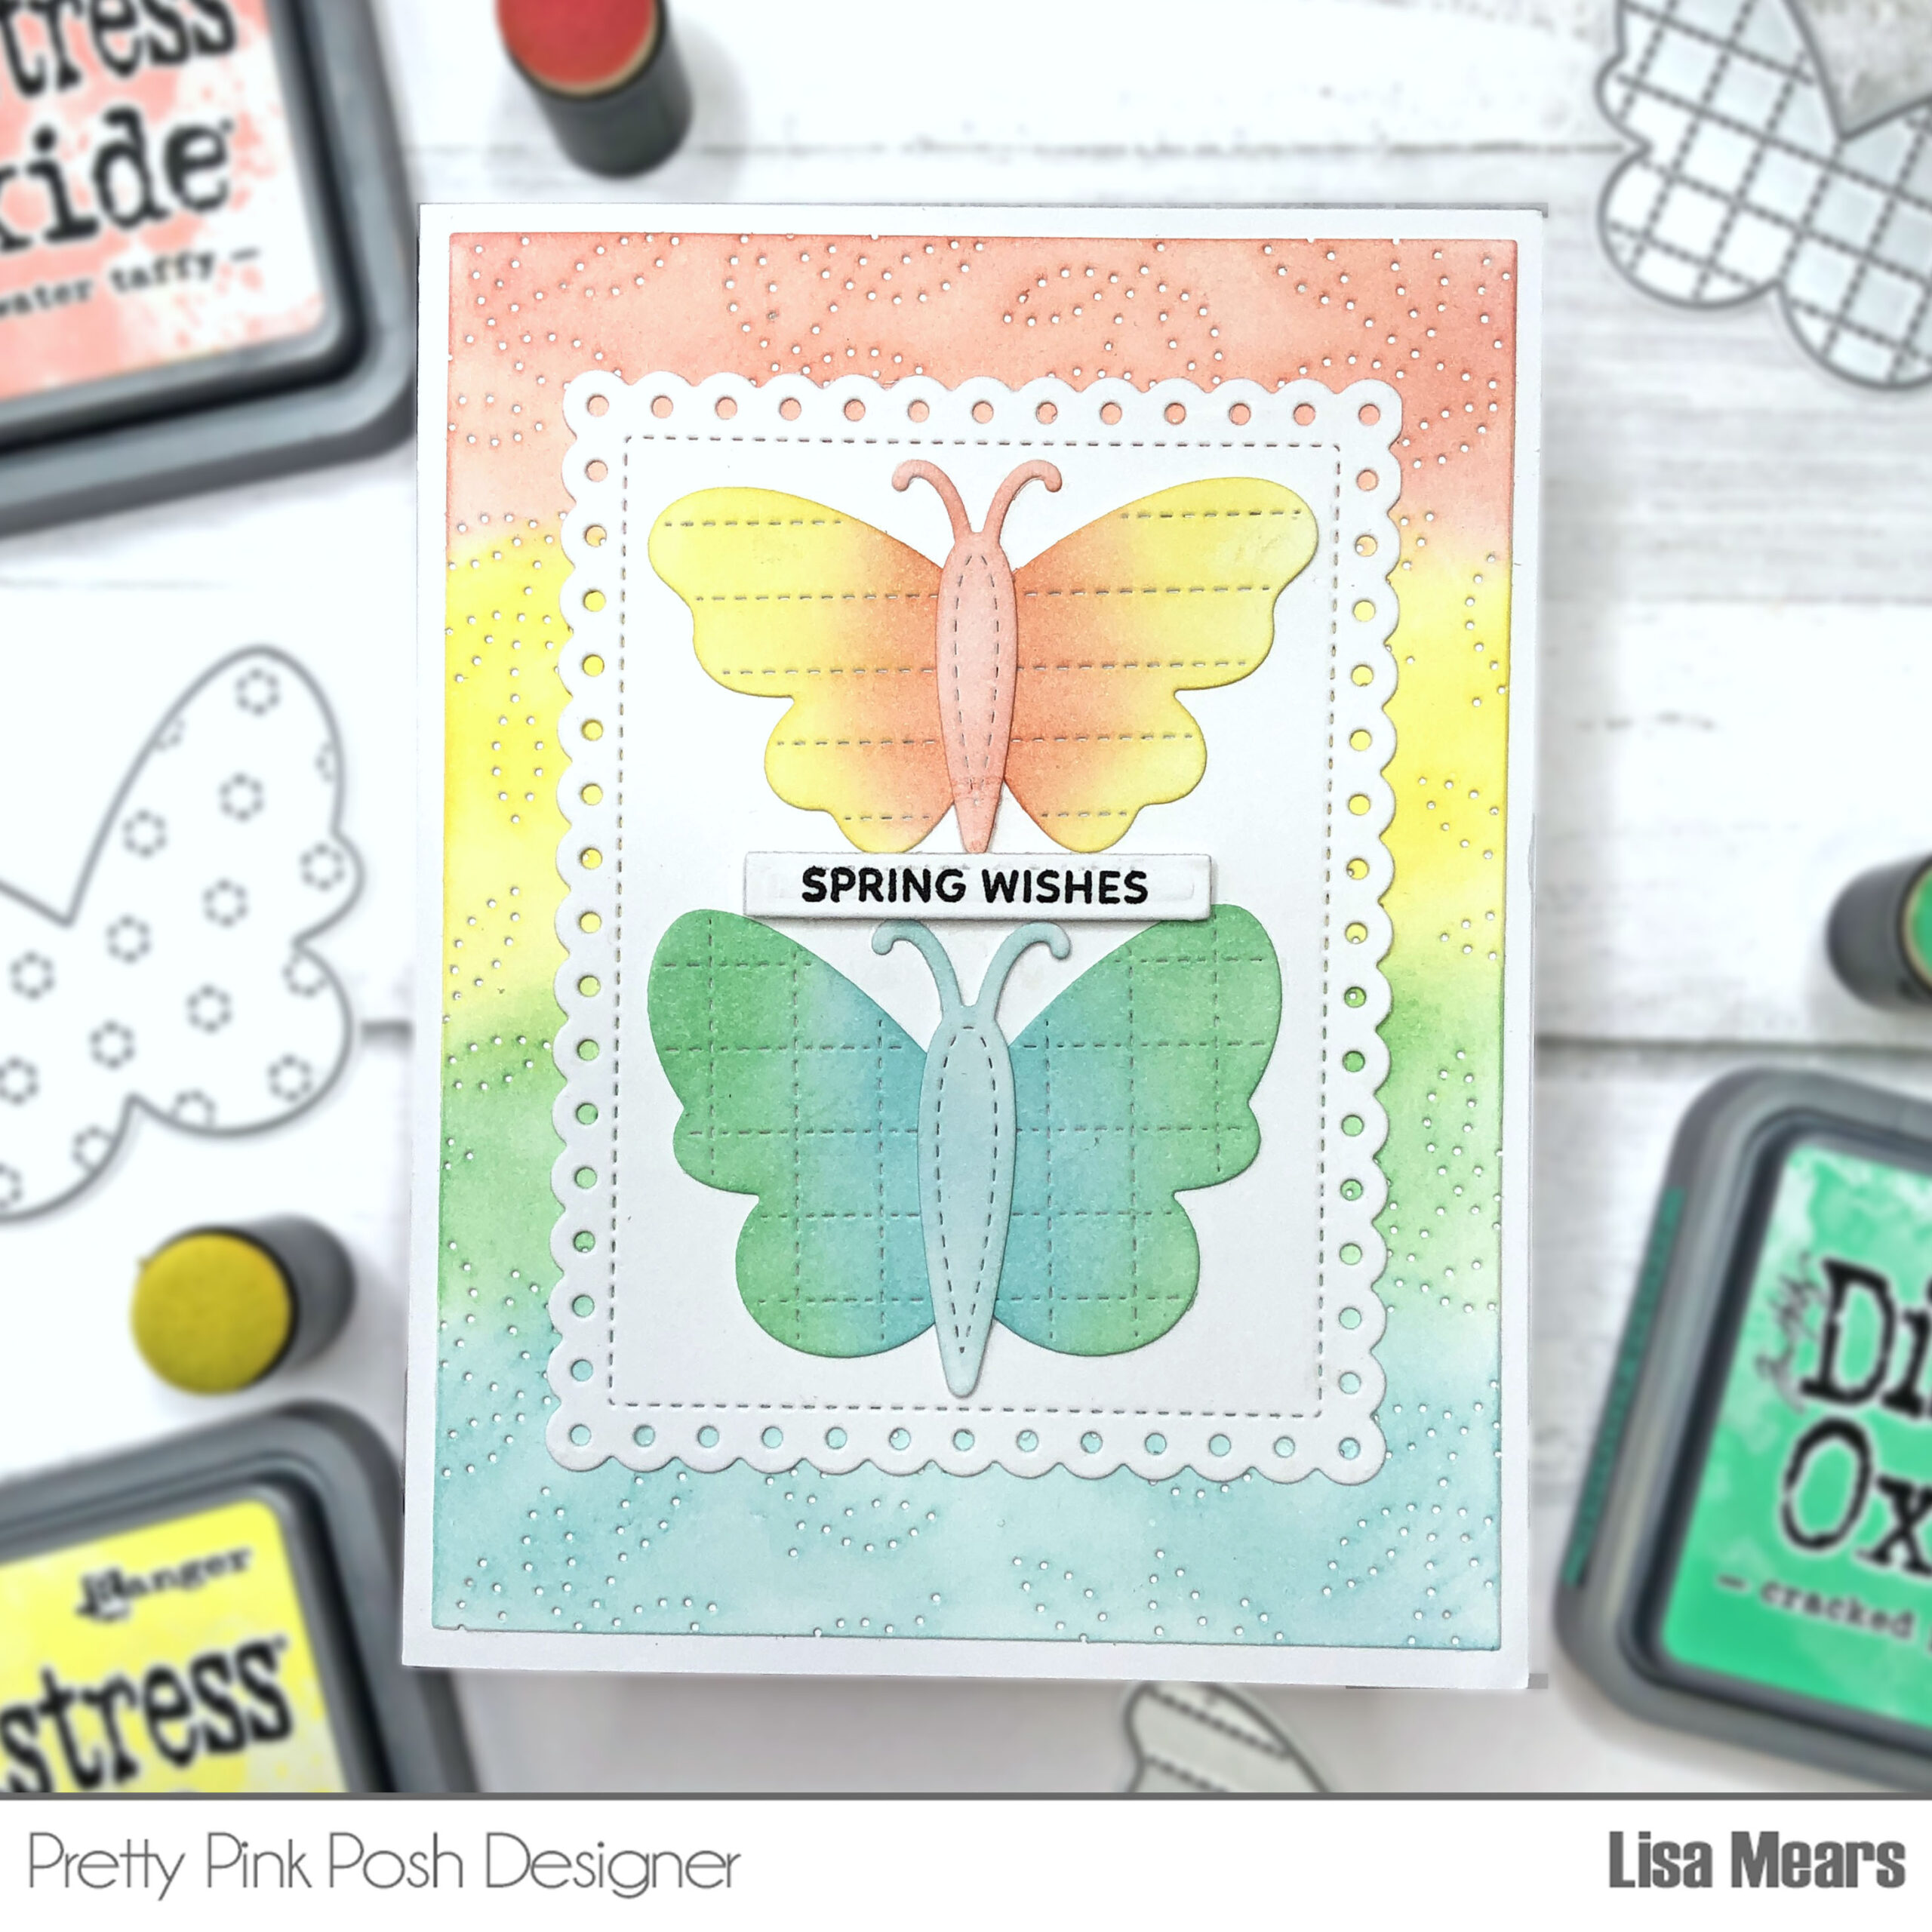
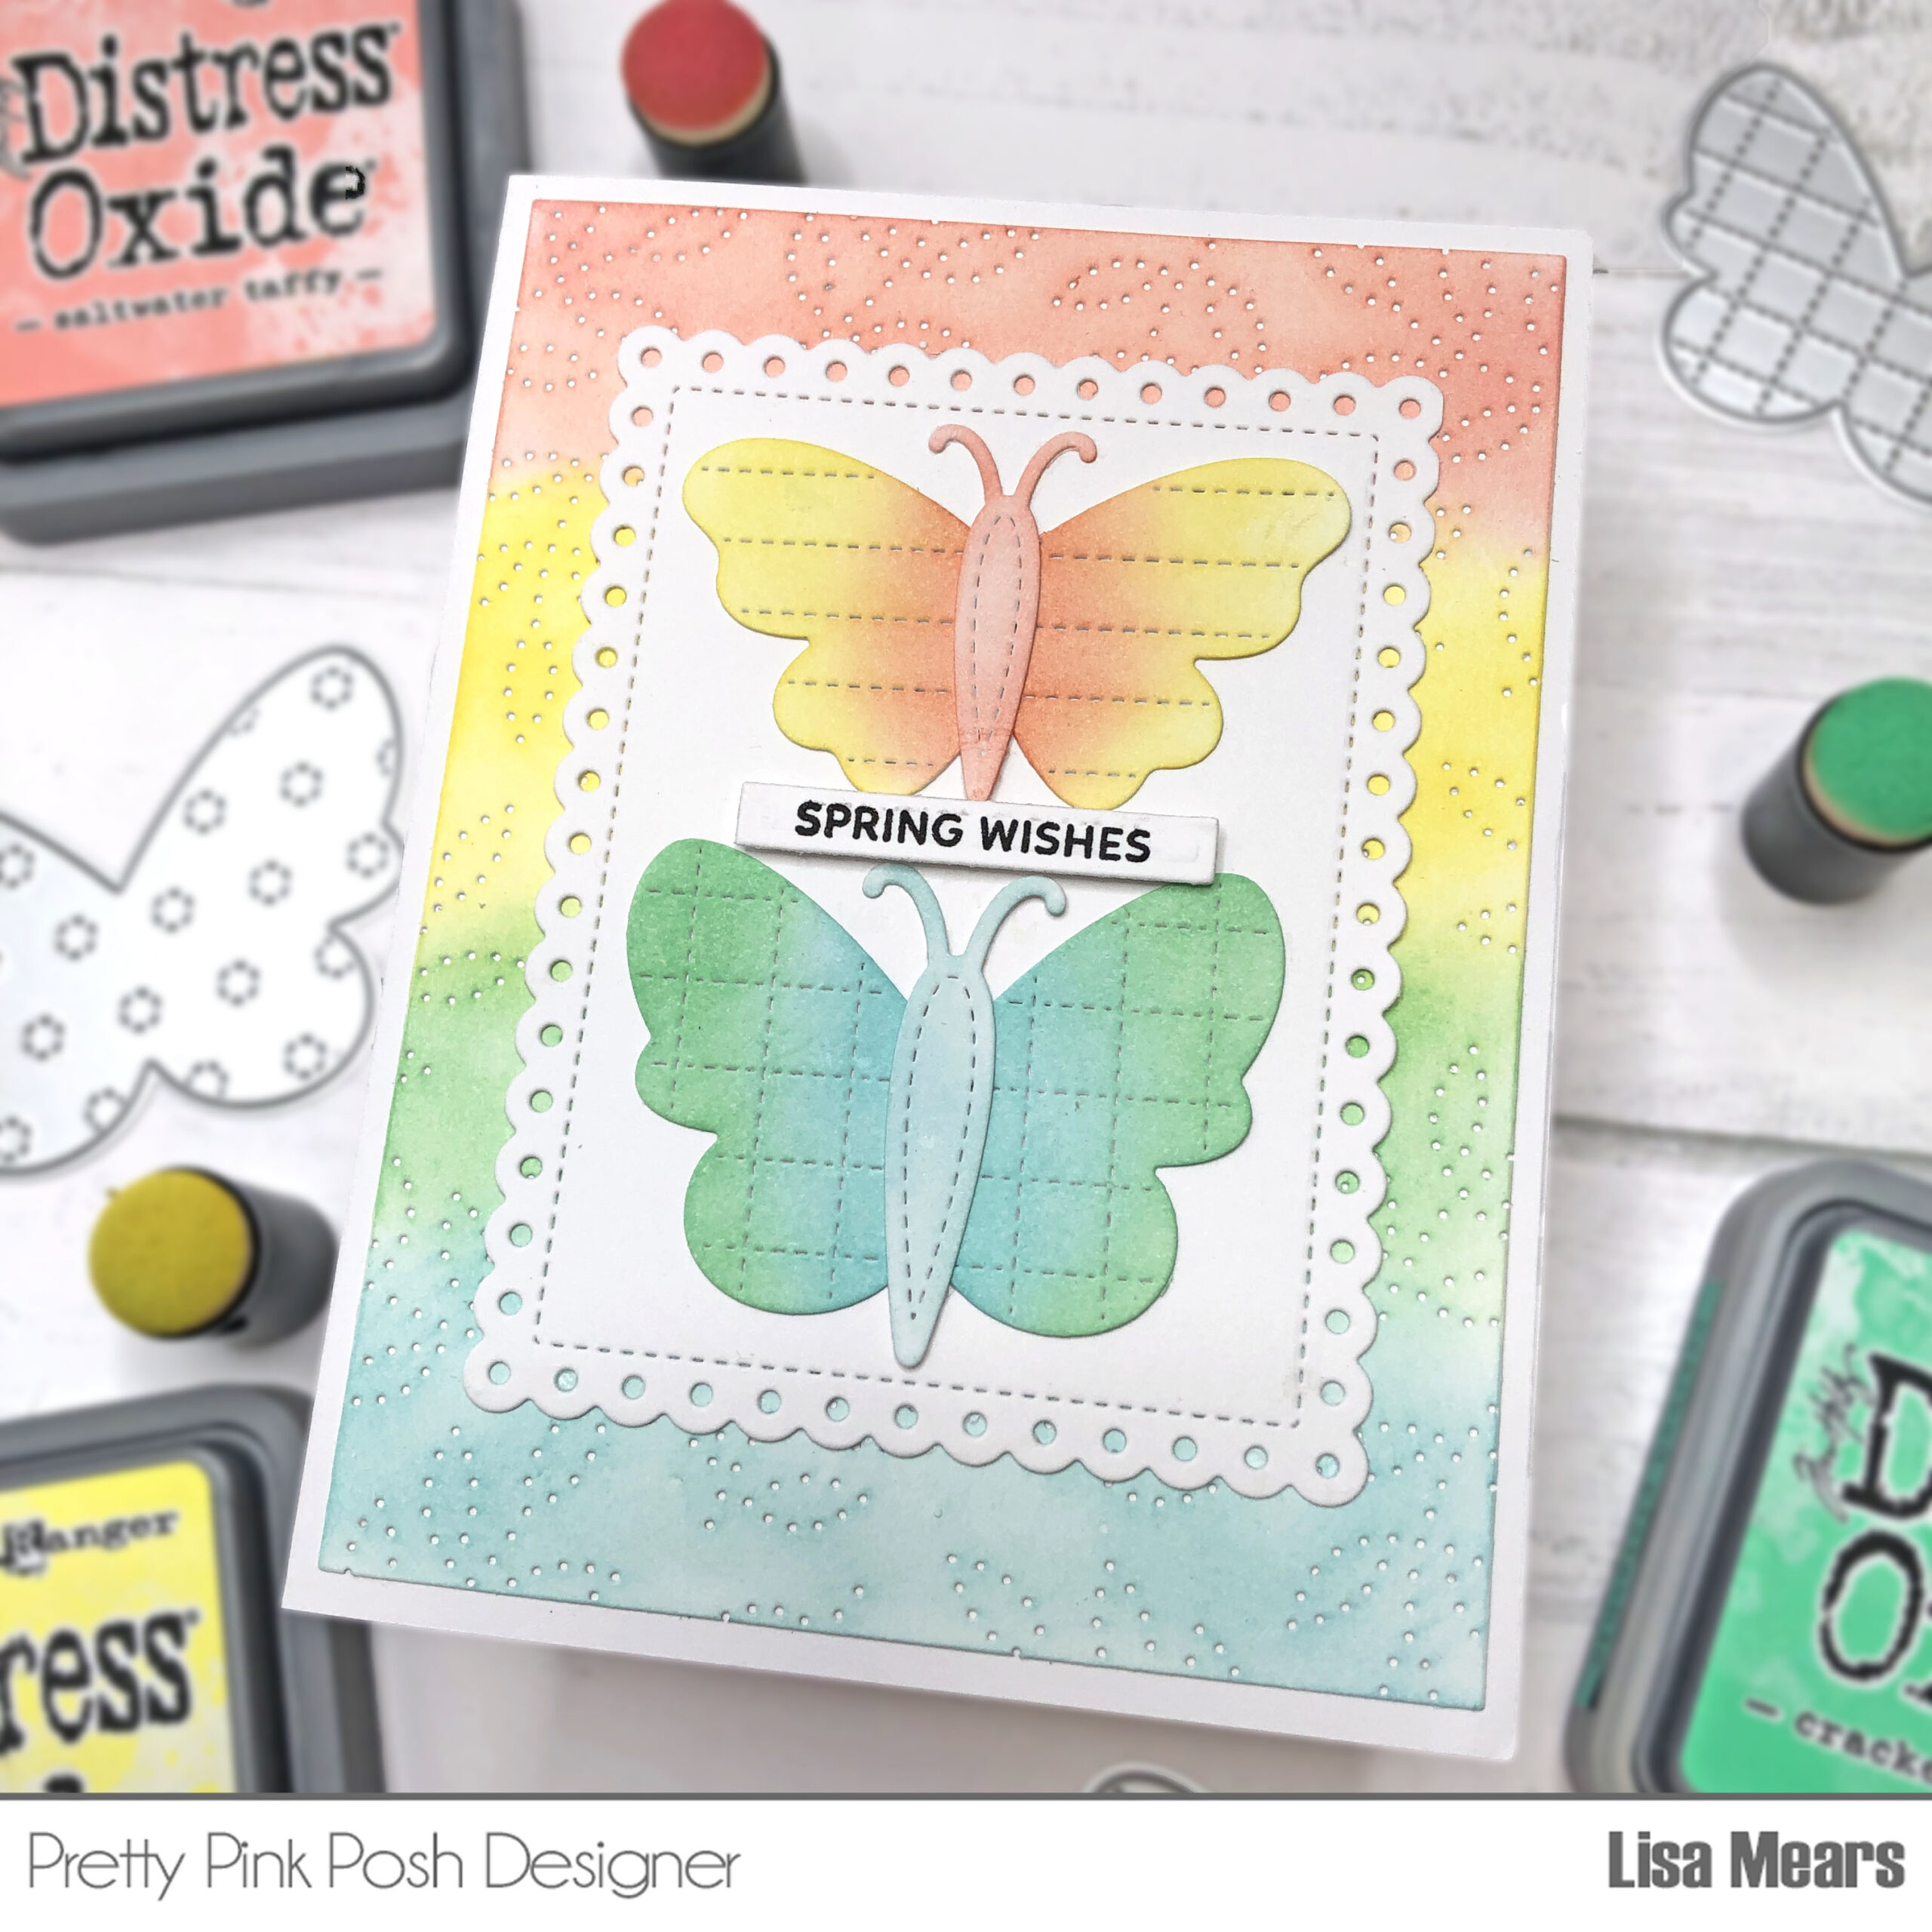
For my next card, I used the Pierced Leafy Vines Plate for my card background. I die cut it with Scrapbook.com Mixed Media White Smooth Cardstock and added the following Distress Oxide inks: Saltwater Taffy, Squeezed Lemonade, Cracked Pistachio, and Tumbled Glass.
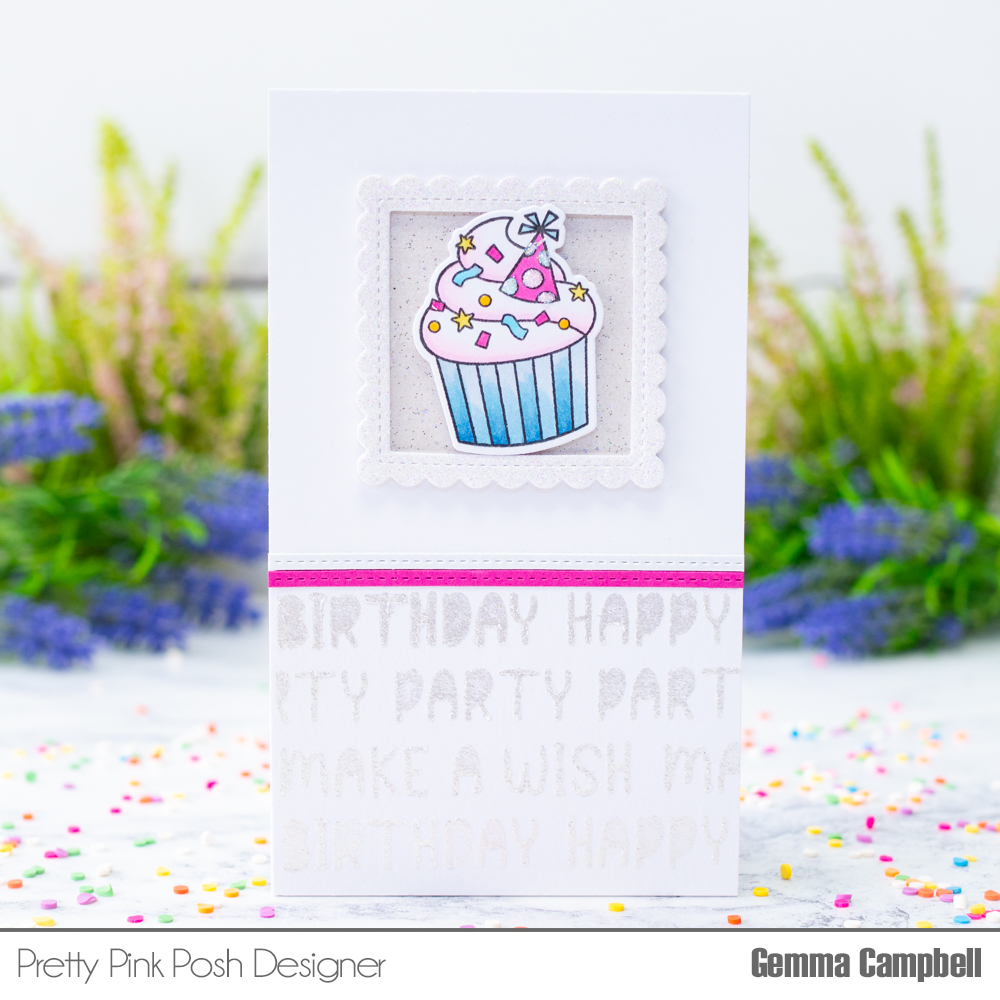
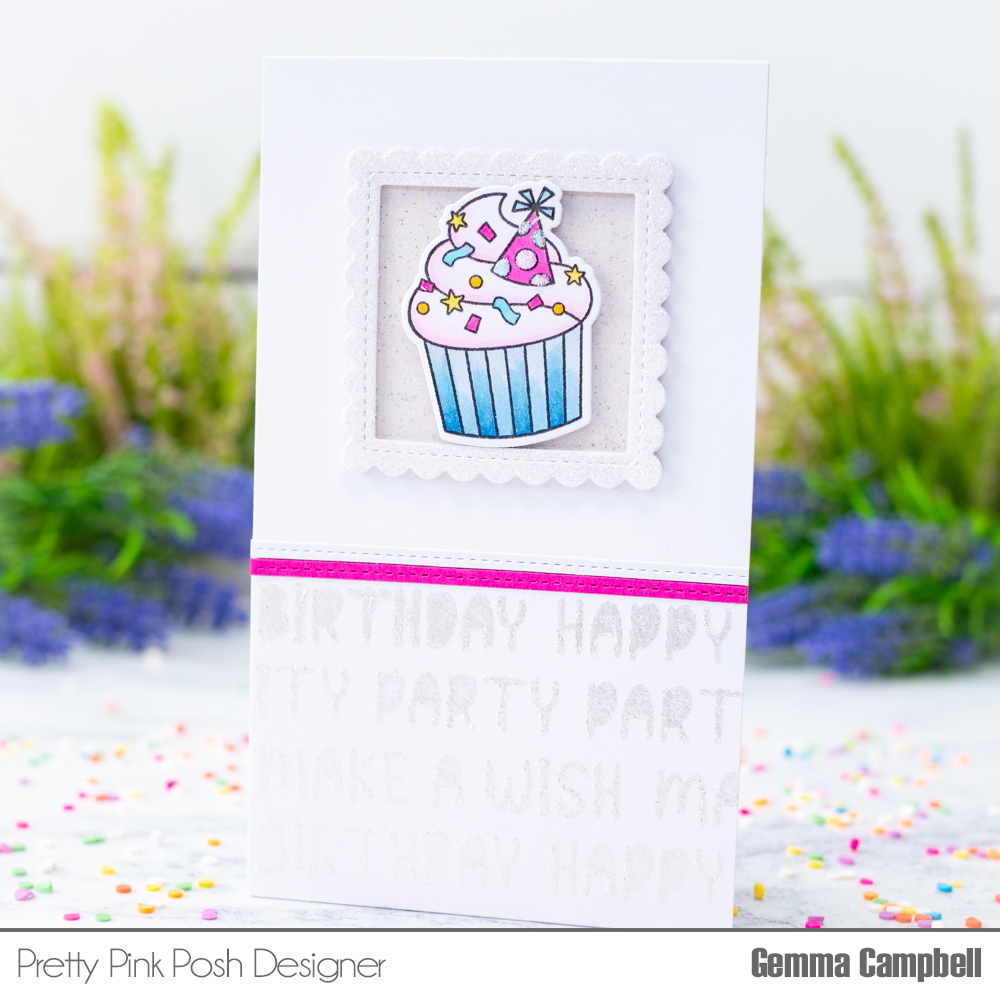
Hello, Gemma here today to share a clean and simple birthday card, featuring some older and newer products.
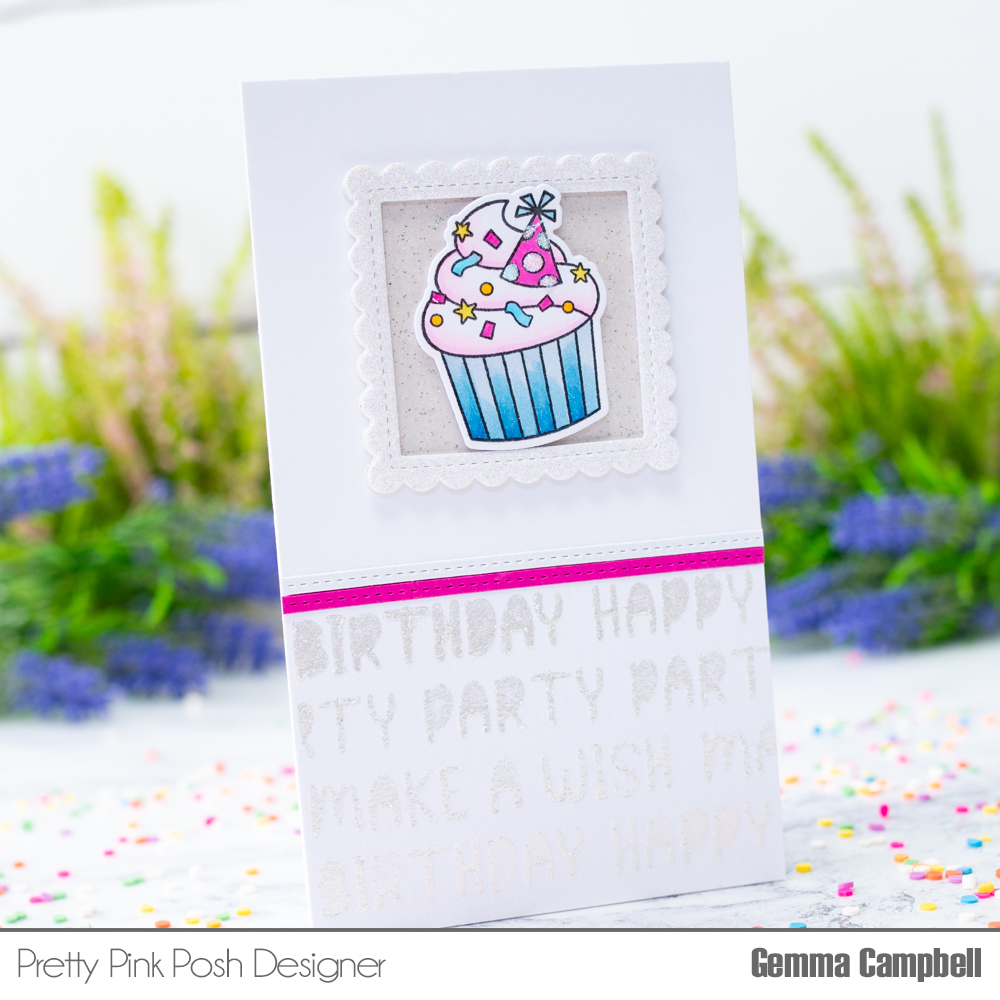
I love the look of pearl white on white, whether it be embossing powder or glacier paste. This is a fun way to add interest and texture to a background, whilst keeping the background subtle.
I used the new Birthday Words stencil with some Winter White Nuvo glacier paste on top of white card. I left this to dry whilst I worked on the rest of my card.
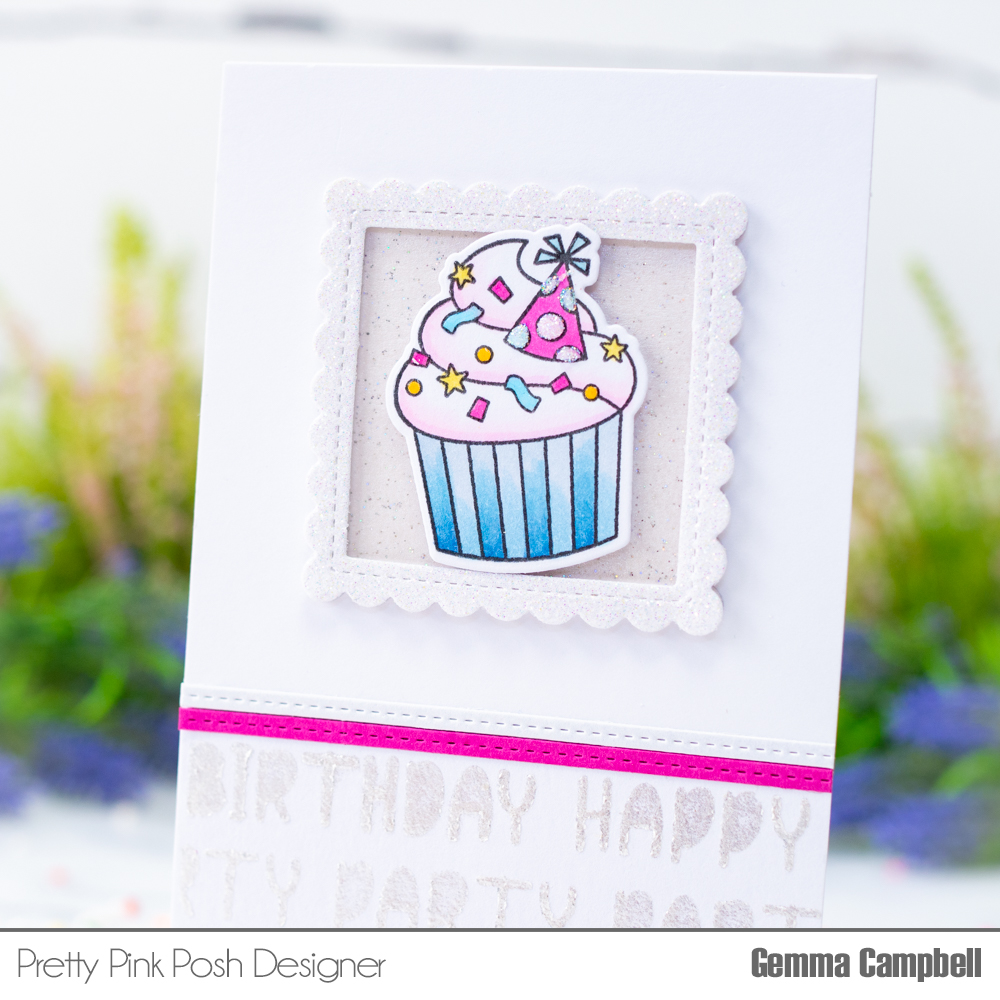
I stamped a cupcake from the Birthday Cupcakes stamp set, coloured with copic markers, and die cut with the coordinating die. I added some extra texture and sparkle with a glaze pen, Nuvo Crystal glaze and fine glitter.
Once dry, I cut the stencilled panel down to 2.5” by 3.5” and adhered it to a mini slimline card. I’ll keep the rest of the panel for another project.
Above this, I adhered a panel of white card cut to 3.5” square. To hide the gap between the panels, I adhered two strips of card – pink and pearl white – cut with the Stitched Strips set.
For some interest behind the cupcake, I die cut frames using two coordinating dies from the Crafty Days stamp set. The bottom layer is pearl white card, then I cut a top layer frame from white sparkle card, with the centre cut out.
I adhered the base layer frame directly on the card, then the glitter frame on top with foam tape. Finally, I added the cupcake with foam tape to finish.
I hope this card inspired you. Thank you for stopping by!
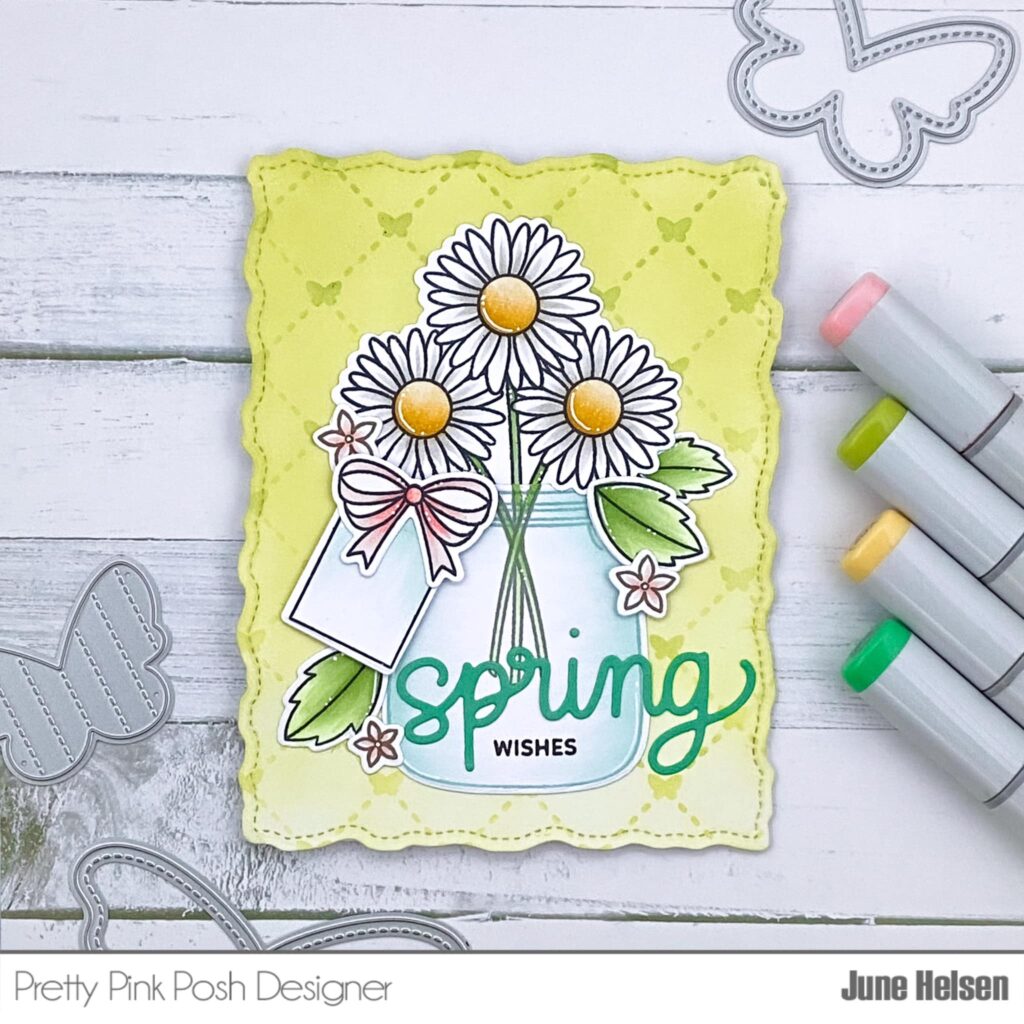
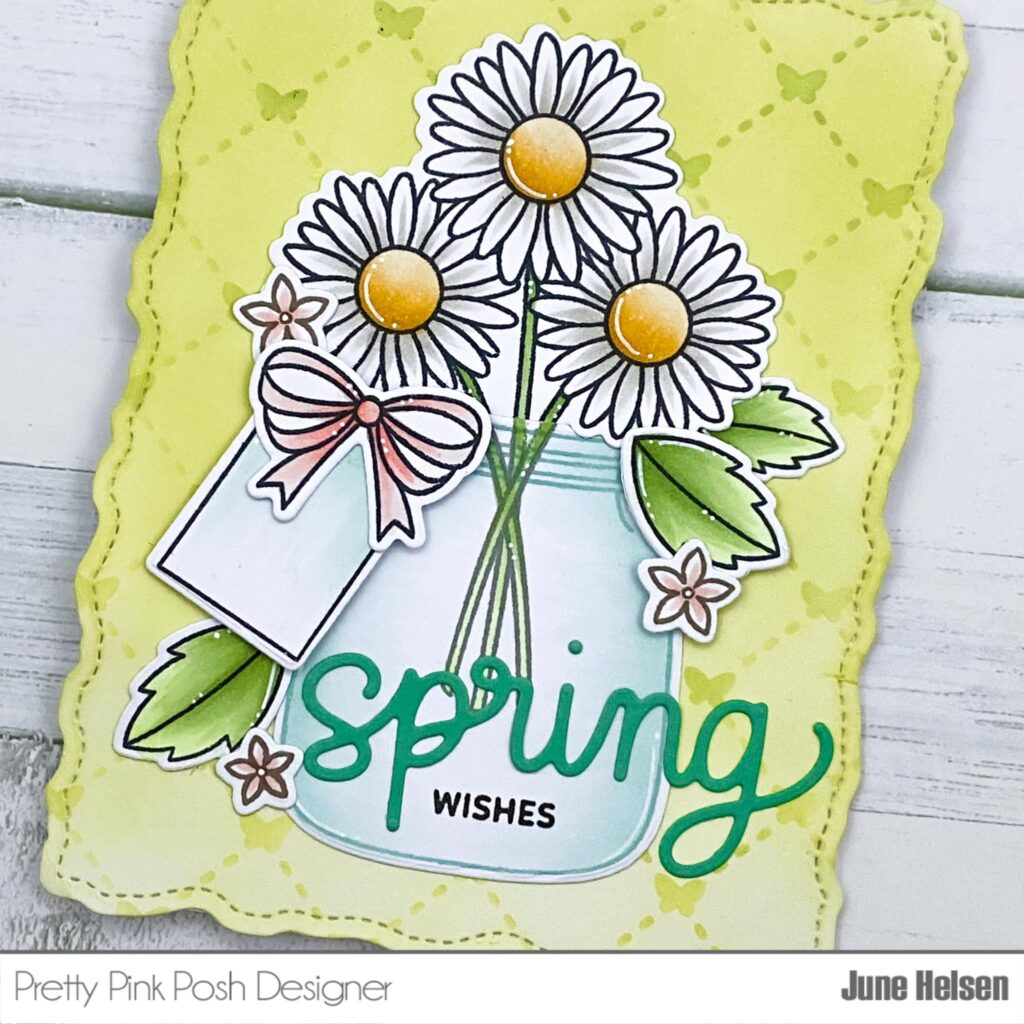
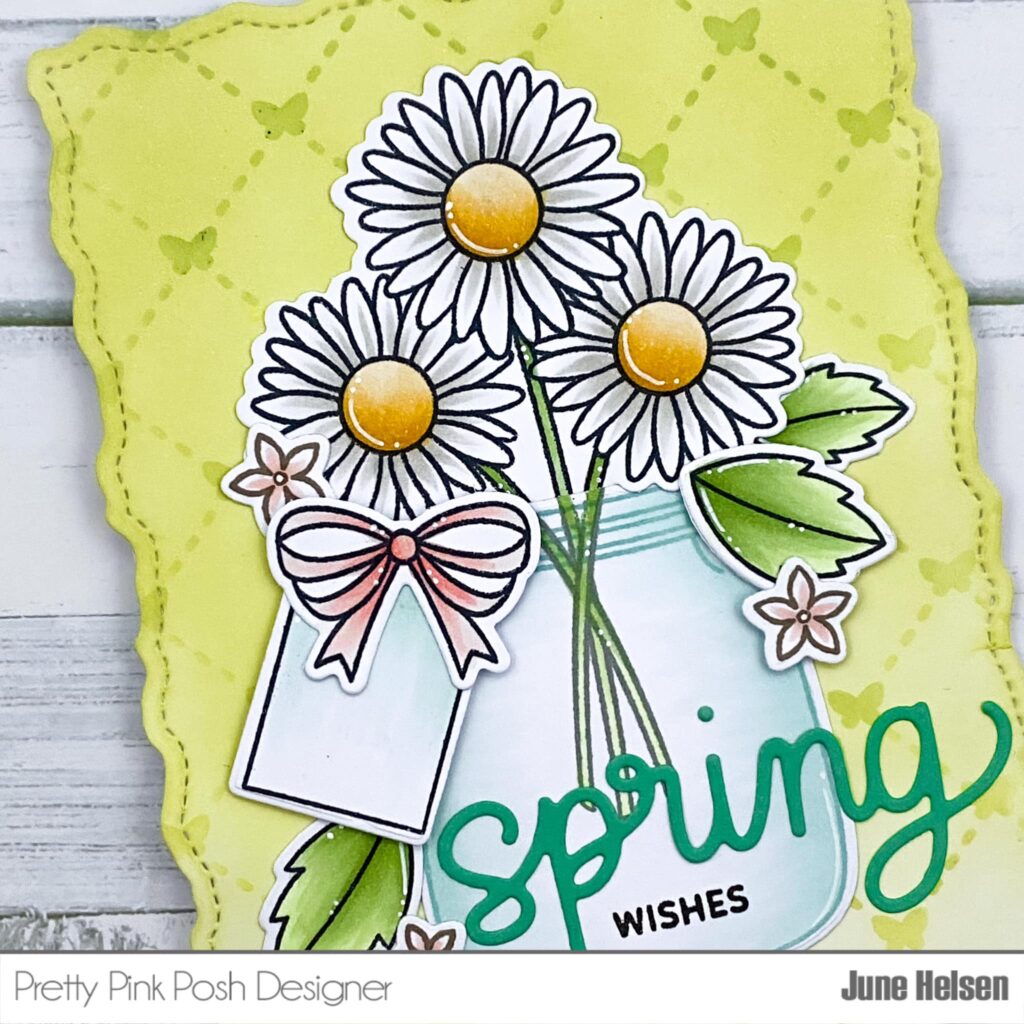
Hi everyone, it’s June again and today I’m sharing this fun spring card with you all!
You know those products that when you see them, you instantly get an idea on how to use them? That’s what happened with the Daisiesstamp setfor me. They just looked like they wanted to be inside a vase of some kind, so I pulled out a set from last year’s autumn release called Fall Jar and used the jar as a vase. I stamped it in blue Copic friendly ink to make it look more like glass. I also used grey ink to stamp the flower stems inside of the jar so they look a bit ‘blurry’ as if they’re inside of water and behind the glass. I used black ink for all of my main stamps, but I decided to use even more colors and scattered around some flowers stamped in brown ink. These are from the Citrus stamp set.
For my sentiment, I cut the new Spring Script out of turquoise cardstock to introduce a pop of color and I stamped ‘wishes’ from Sentiment Strips: Easter to complete it.
I hope you enjoyed reading about my card as much as I enjoyed making it! I feel like these Daisies are gonna be a good staple piece in my stamp collection. They would work for so many occasions!
Anyway, I hope to see you all again next month, bye!